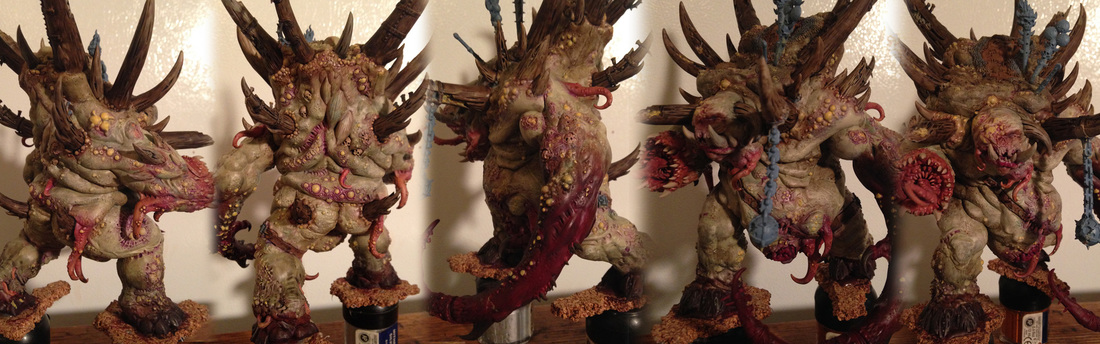
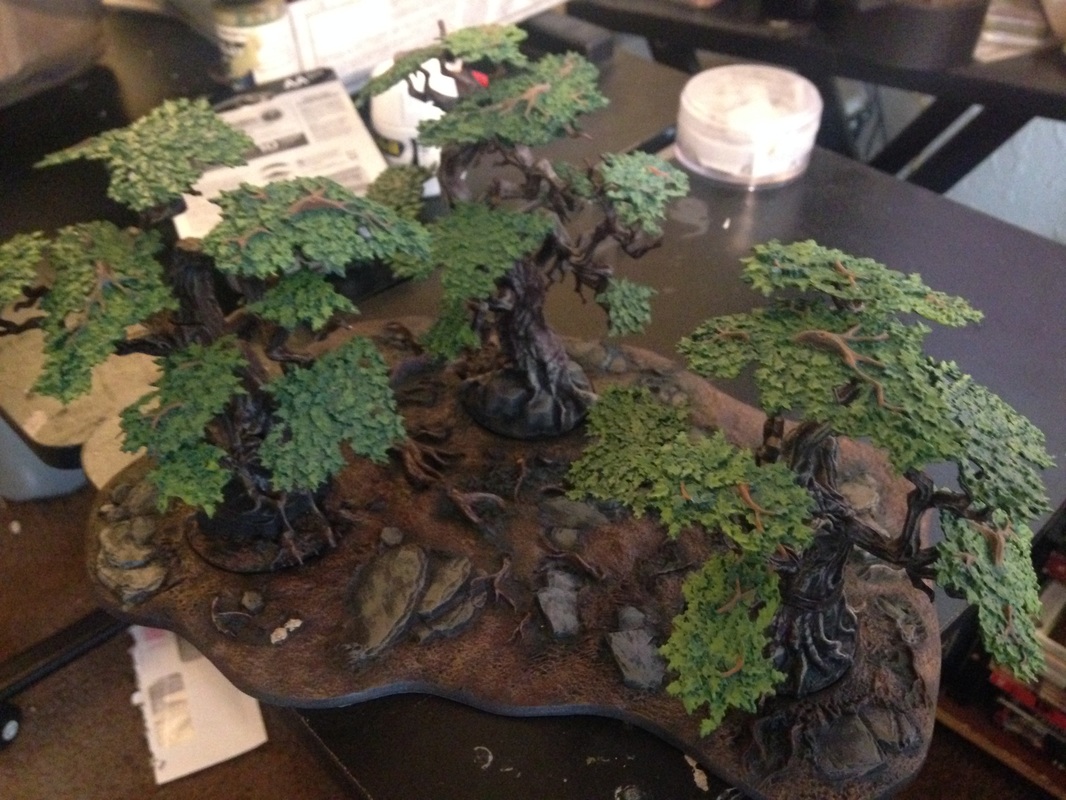
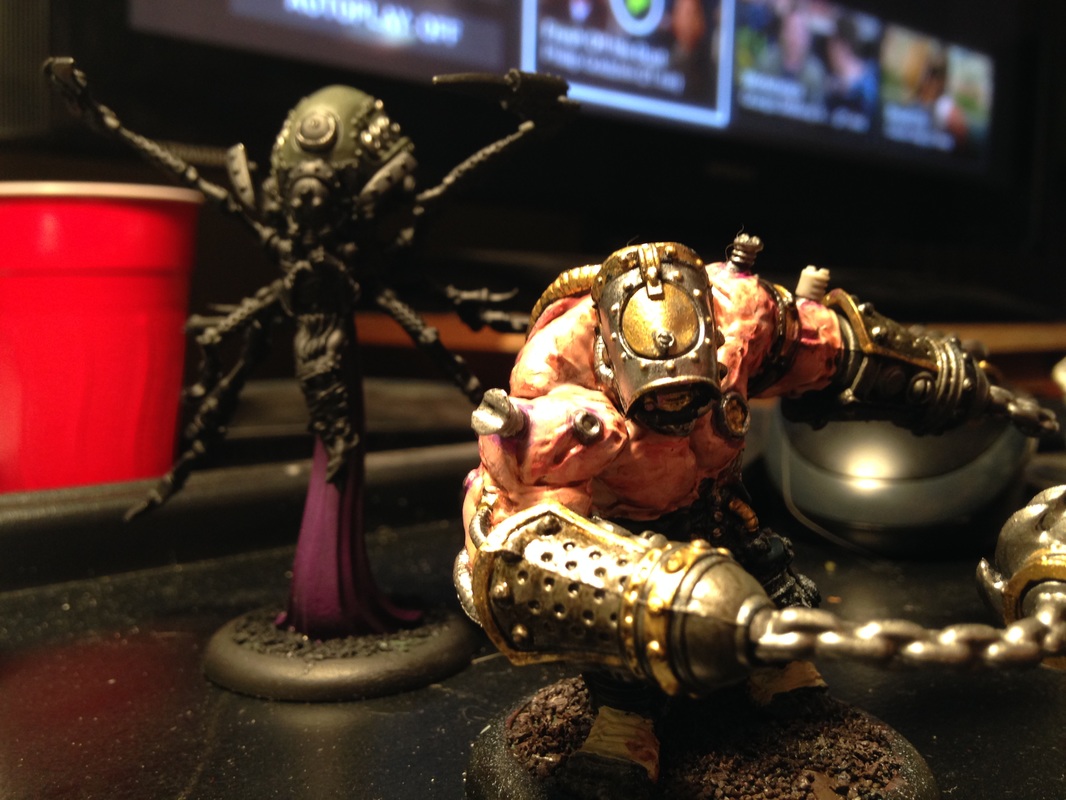
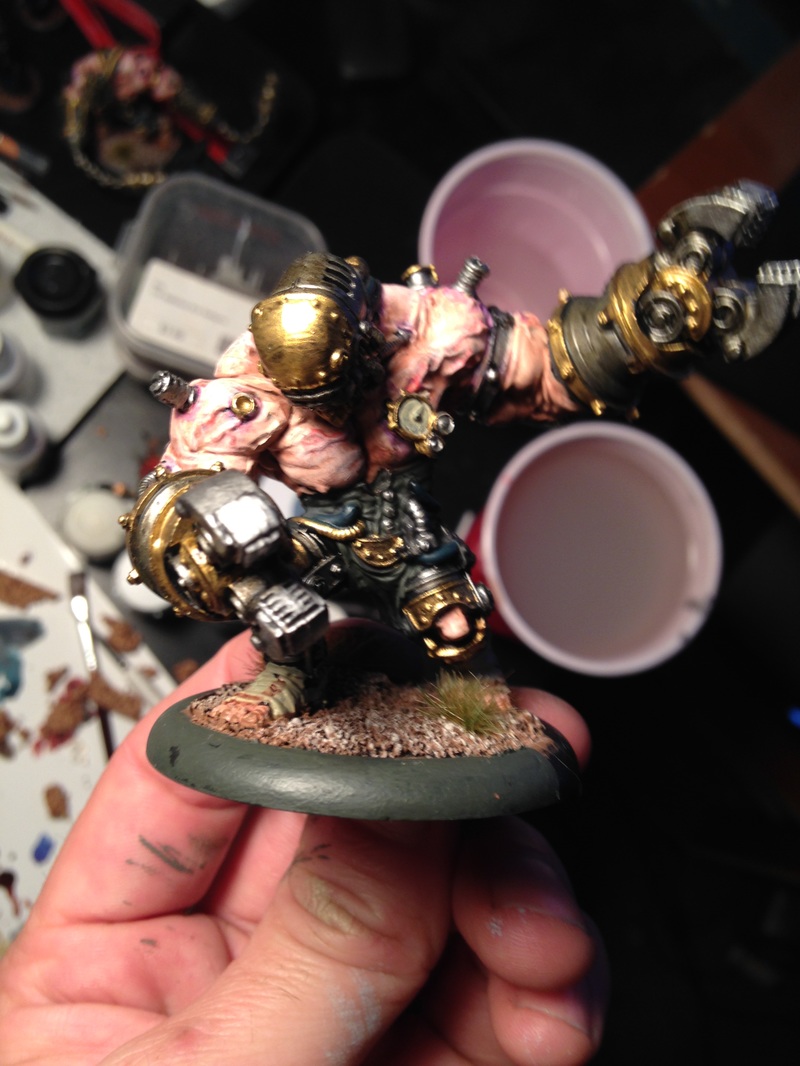
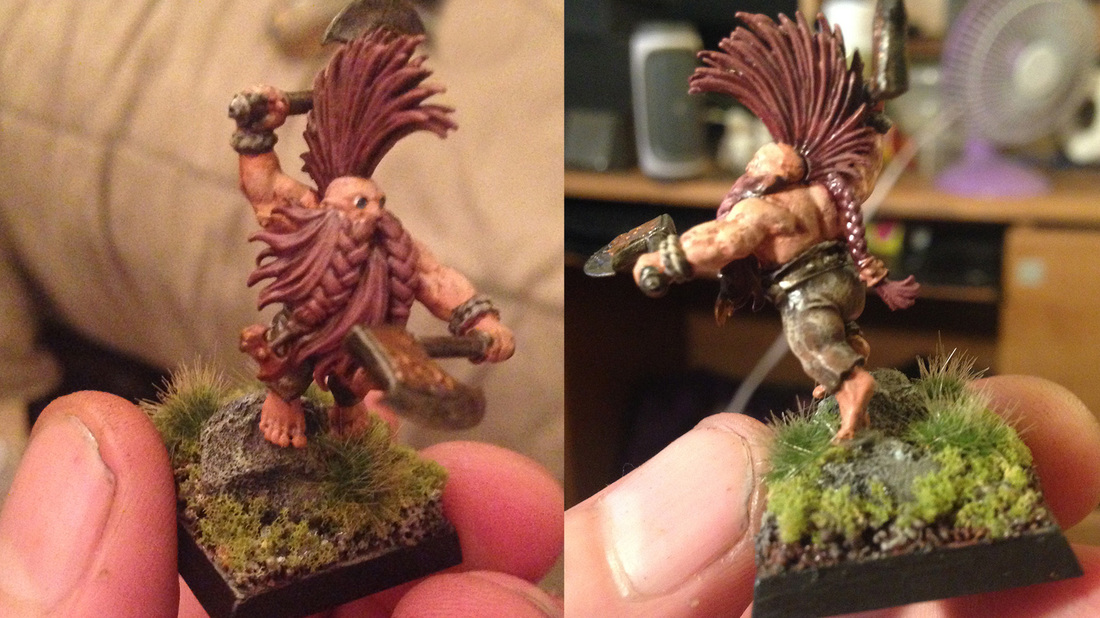
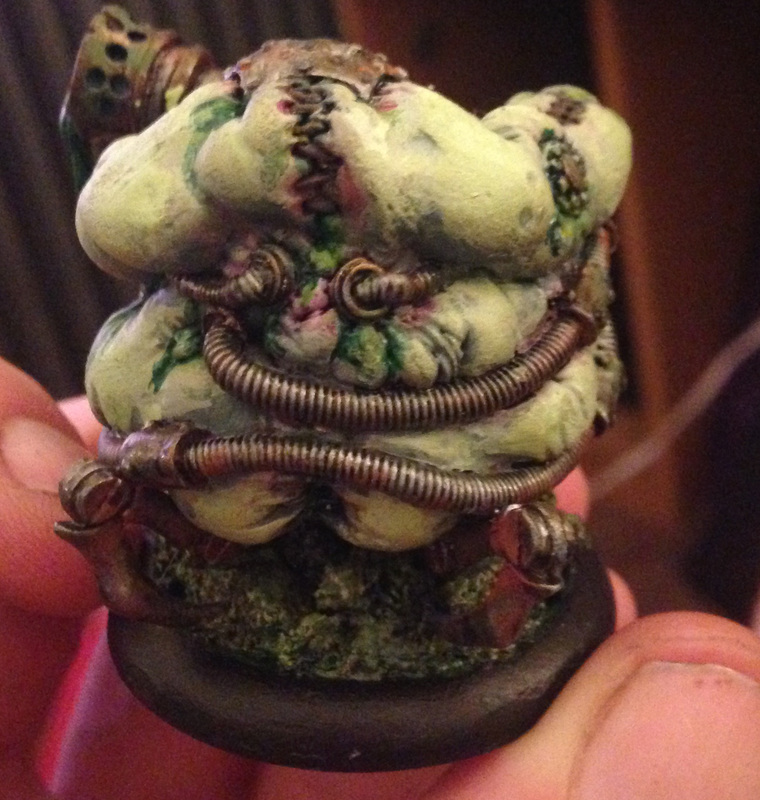
Celestial Thunder Ryan "The Monnster" Monney will be playing The Stormcast Eternal, the do good-ers from the celestial plane. Armed with holy lightning they spread out among the Chaos dominated plane's of existence to exact their revenge on the unholy conquerors. Here's a look at his mini's: 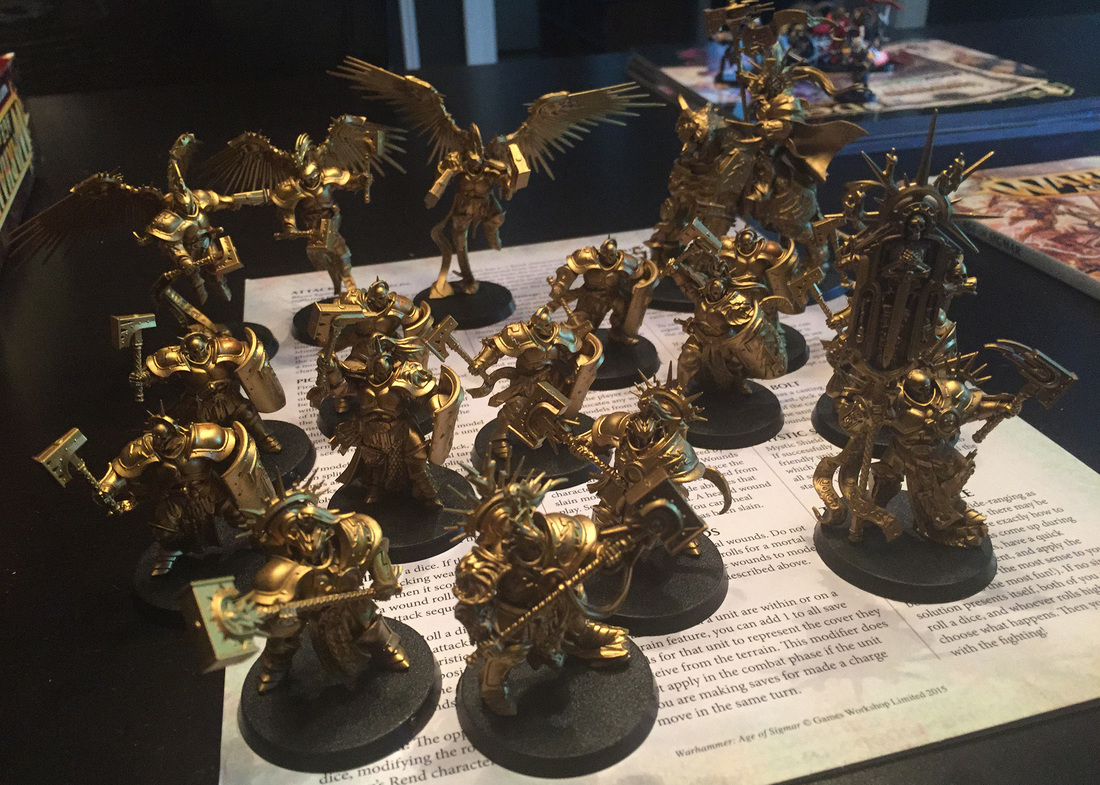 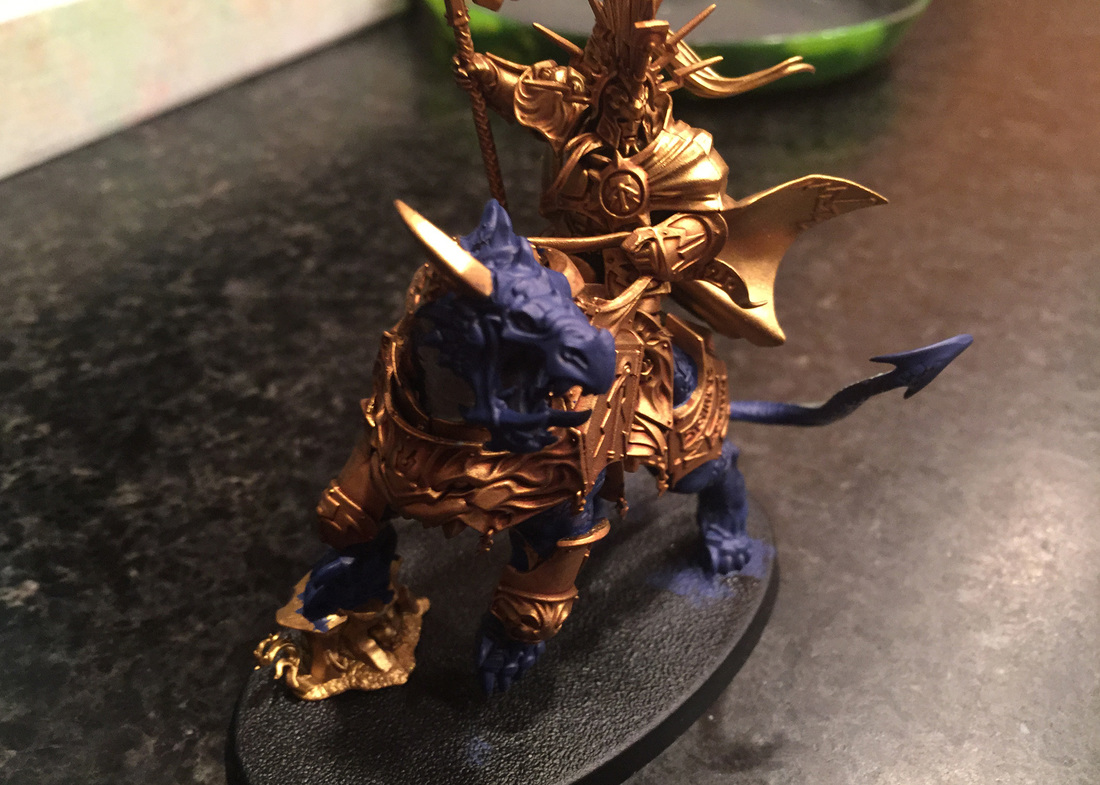 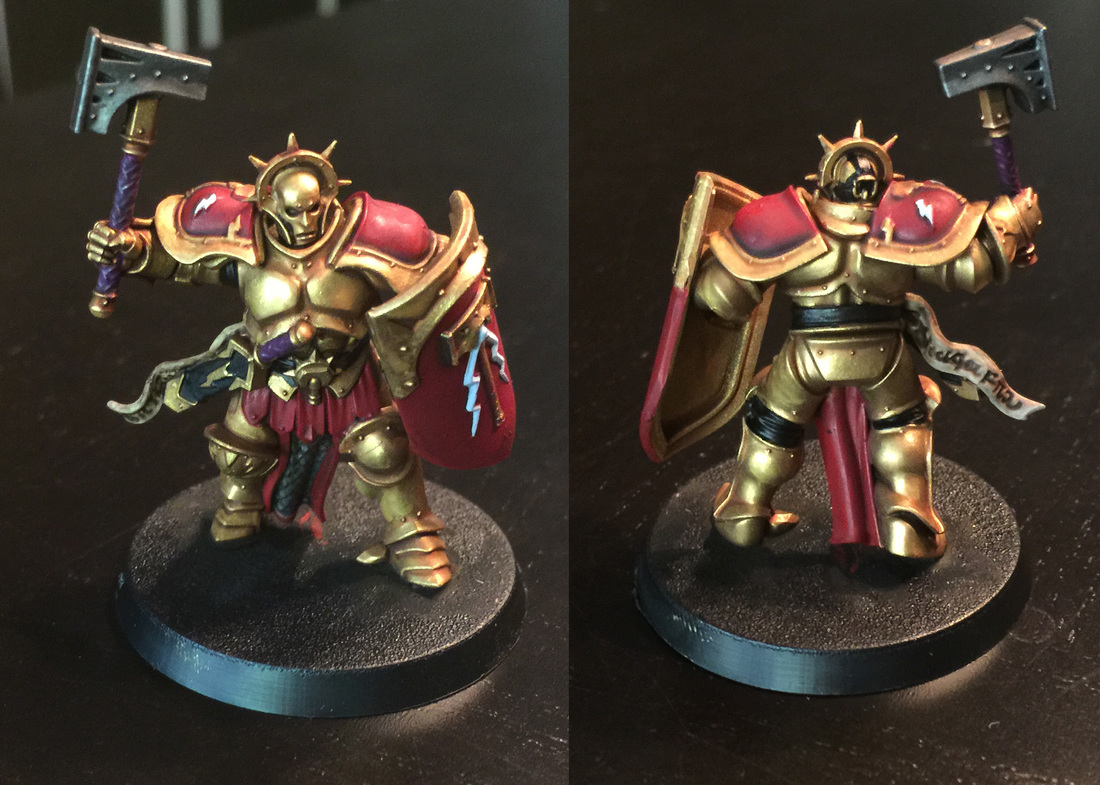 And here is the Stormcast cheerleader showing her support of the recent paint job.  BloodboundNatoneus will be fielding the Khorne Bloodbound. Chaos has taken control of the Realms of the Mortals and have left nothing but a war torn apocolypse of a wasteland. Scouring the realms for areas to conquer, the blood bound live by a fierce code where only the fittest live to continue the path of destruction. Here's a look at the Khorne mini's. 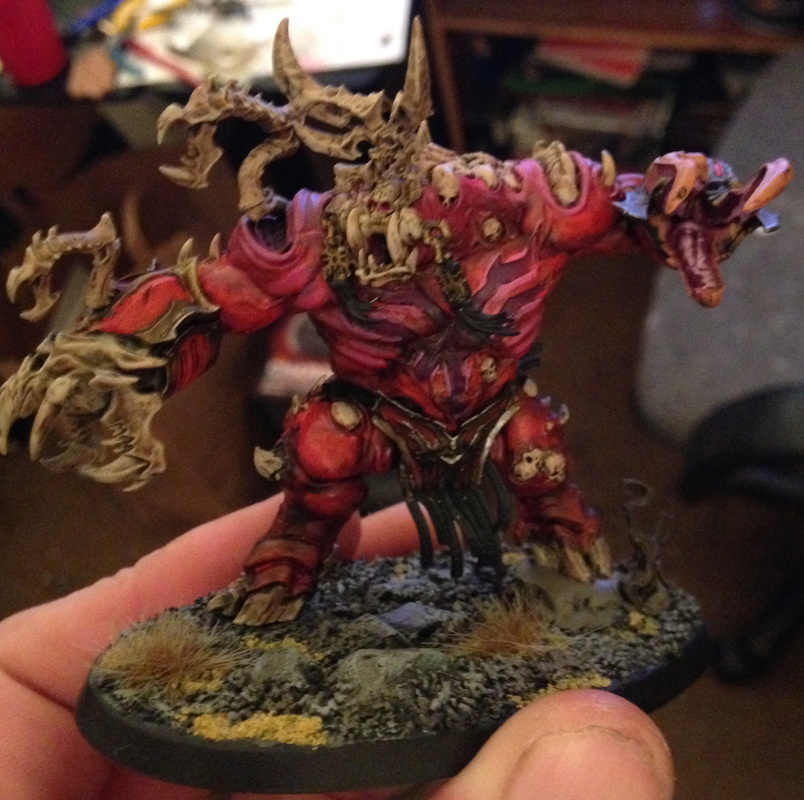  The Battlefield We will building and painting our own terrain to tell the story of the Battle for the Mortal Realms. Here is the start to the main table tiles we will be warring on. 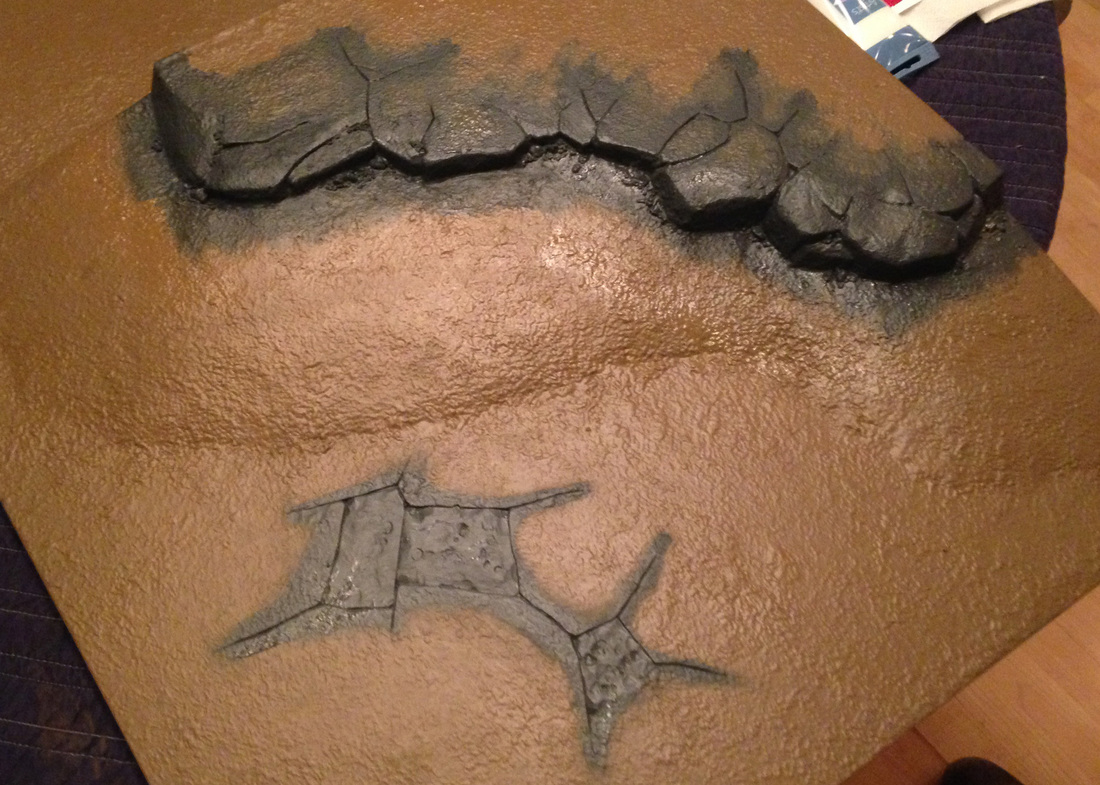  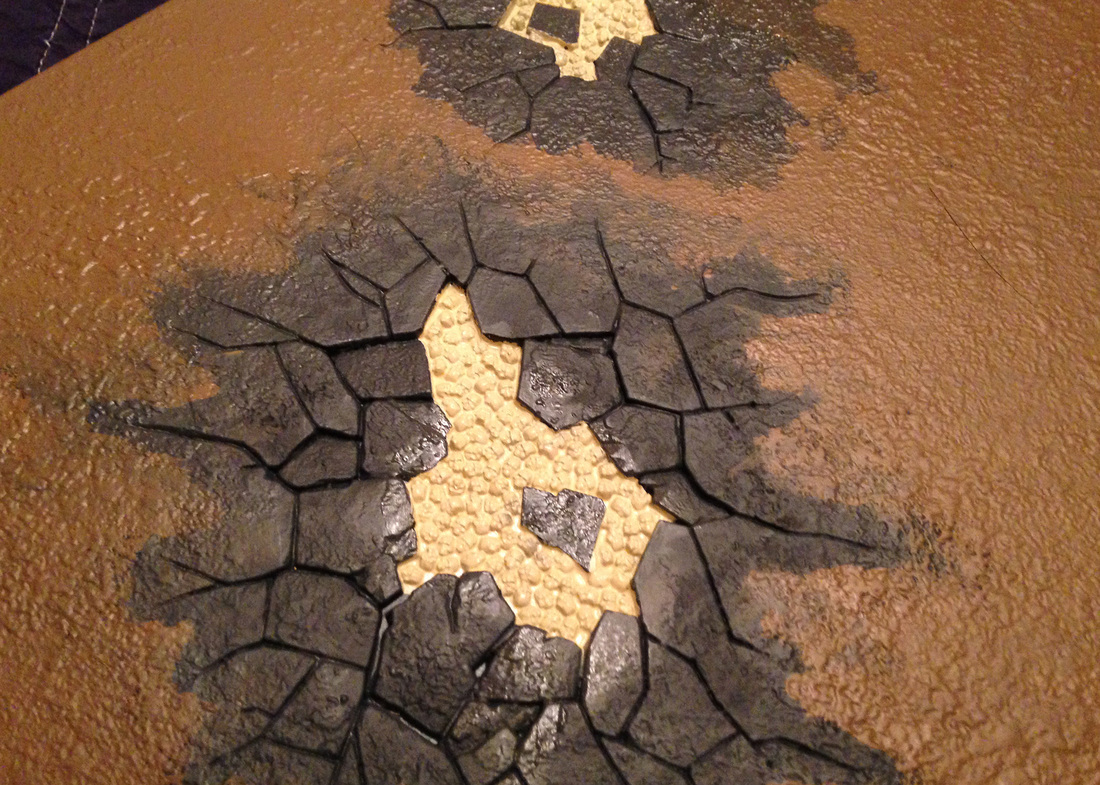 I realized recently that all the terrain pieces I have created have been completely unrelated to each other. This made me want to create a set of terrain that will fill a table with unified pieces. I chose to go for a fantasy based ruins theme. Very lush, rocky pieces of terrain and large, aged stone work was going to be my goal. I wanted to make things very heavily vegetated, overgrown and weathered.  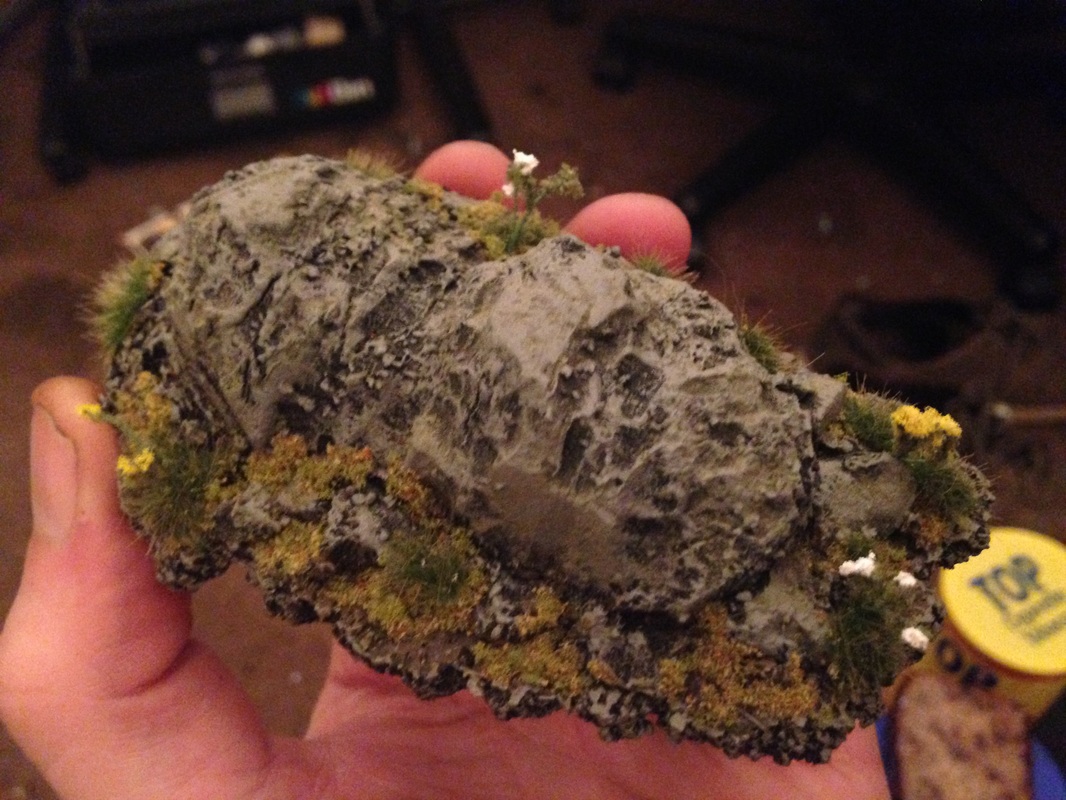 I picked up this Warhammer Dwarf for a DnD campaign that I recently joined. He is the Dragon Slayer mini. I cut him off the original base and made a little forest floor base for him.  I am going to take a quick post to look at my painting process. I don't really use any special tricks of my own, I use a huge collection of borrowed techniques, processes and theories. So keep looking around online at tutorials and pick up as much as you can. I recently worked on the Bloat Thrall from Privateer Press. Cephalyx mercenaries are allowed to field a few Cryx models, so I chose this ugly bastard: 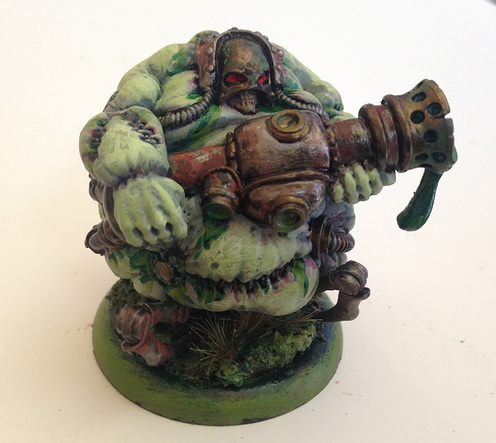 The first steps I go through with any model is to decide the mood or theme I would like to achieve. In many cases the theme is fairly apparent. Like this guy is an undead bag of corrosive ooze with a hose attached to his back that loads the cannon with his own bile waste. So I'm probably not going to attempt to make him regal and dignified. I find the most important aspects of creating mood is your color pallet and lighting. As far as lighting goes, I don't have enough confidence, skill or patience to attempt to paint direct light sources onto my minis. So I stick to natural lighting for my models. This is a relatively easy method to build depth and realism on your model. The idea is to darken the areas facing the ground and lighten the areas that face the sky. This attempts to emulate local or sky lighting as well as bounce lighting from the ground. This is a great way to define the large forms of the model and really brings out the three dimensionality of the mini. There are many more nuances and principles to lighting that can add a lot of drama to your mini. So read up on light and how it interacts with forms to really get a strong grasp of what you can accomplish with different lighting schemes. I will be attempting to paint a light source on the terrain piece I am currently working on, so stay tuned for that break down. On to color. Color theory goes way beyond what I am going to go into here, so of course, go out and do some research. For most of my miniatures, I tend to paint what is called a 'complimentary' color pallet. With this pallet you use two colors that are on opposite sides of the color wheel. For example, orange is the complimentary color to blue, as is yellow to purple. This pallet gives you the most contrast between your colors while remaining naturally pleasing to the human eye. I find with working at this scale it is very important to have the forms read as clearly as possible yet still harmonize with the rest of the model. Complimentary pallets and natural lighting are simple and very helpful ways to bring your model to life. Painting: So to start, I knew I wanted a lot of rotten green colors happening on this model. I figured a green tint to the skin and a fair amount of saturated green ooze seeping out of him would hit the mood I wanted. Using the complimentary theory, red is going to be my second color. I figured in the end I could rust up the metal areas to bring reds into the model. Also, brass typically has some red hue to it, so I figured I would let some dominate areas be brass. The helmet and end of the cannon would work well for broad areas of my complimentary color, so I will do those as brass. I decided the main part of the cannon and all the tubing I would be a dark metal and I could dapple rust on them to make it blend. I primed the model with a blue-grey primer. When it dried I used a dark brown wash in all the crevasses of the stitching, the deep areas or seams where the skin meets another surface and finally along the seams of the metal. This creates a nice effect know as self occlusion. This emulates the appearance of light diminishing as it bounces into non-illuminated areas. It's nice to do this before the base coat so you can get these darker areas from the start. For the skin, I mixed a very pale flesh tone, then added a small amount of green. This made for a nice start to the undead skin and I was hoping it looked like you could see the translucency of the bile under the skin. For my metals, I start with a base coat of the color that I want the metal to take on. This layering will build up color into your metals. I find that metalic paints don't usually give very much hue to the model, so this will help with that. I laid down Cryx Bane Green for any dark metal surface and Sanguine Red Base for the brass. 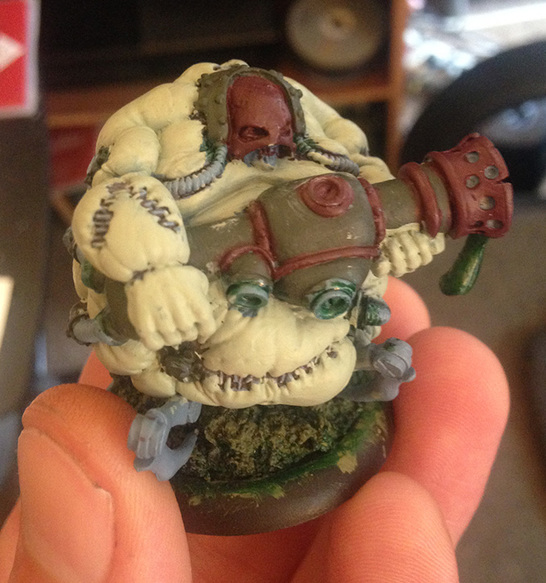 My next step is something I don't use on every model, but it makes a great weathered or beaten effect on skin and leathers. I know it as tinting. I wanted to produce bruising along the skin where the metals are attached and where the skin is sewn together. To accomplish this effect, I used a heavily watered down beaten purple. I loaded up a brush and tapped the excess off with a paper towel. Lay the brush down where you want the effect heaviest and let the paint settle then pull away from the seem and the paint will naturally diminish to colored water. You want to apply your tinting before your shading to keep everything blended. I then added some green ink in areas where I thought ooze might spill out of the stitching and plugs. I added my first coat of brass to see how it looks. I painted the dark metal areas as well but did not photograph at that point. 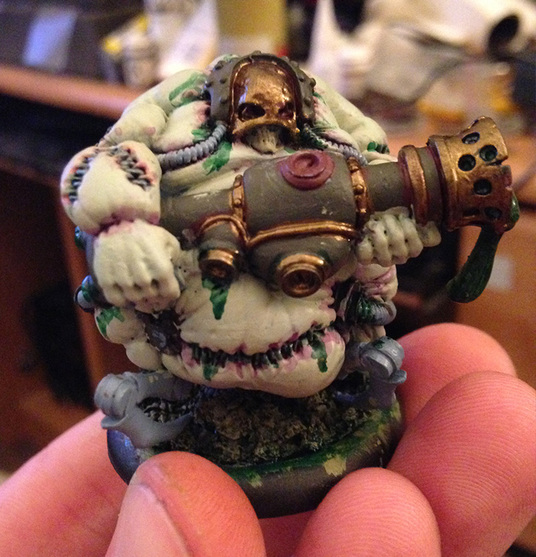 Once you're satisfied with the results of your base coat and any effects you used, it is time to move onto shading. At this point, the model should look pretty cool and start to take on the theme you are looking for. But it looks kind of flat and cartoon like. Shading is a process of painting dark area on the model to define the form of your figure. This is part of the process of lighting your miniature. The idea is to use a wash or watered down paints to darken the color of your base coat where the shapes fall into darkness. If you are attempting to paint a direct light source onto your model, this is how you define the shadows. You can also use this step to create the bounce lighting on your model, that is lighting that is "bounced" off the ground or other surface and onto the non direct lit surfaces of your model. For the Bloat Thrall, I had read a good tip for shading undead skin a pasty blue. I mixed a very thin, pale blue. I added darker values until I had a nice medium darkness to the color. It has to be fairly darker than the base skin, but not too dark or it will look unnatural. I use a similar painting technique as the tinting, but in much broader areas and much thicker. The semi-translucence of the paint or wash allows you to build up a few layers during this process. Allow the wet paint and washes to seep into the deep areas of the model and spread the pooled paint out from the corners and crevasses. Use more on the under side of the model than on the top. I made the shading at the bottom of model heavier and even a little darker. This exaggerated the depth of the model by creating planes of separation of the light hitting the miniature. I used armor washes and mixes of green and brown inks in the same process on the metal surfaces. The last step I take a model through is the highlighting. This is really what make the model pop.
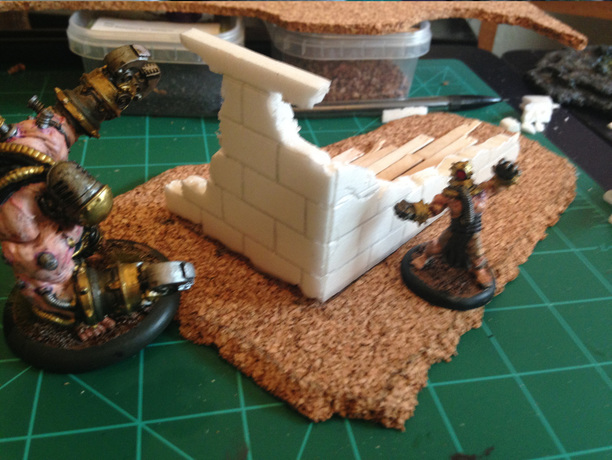
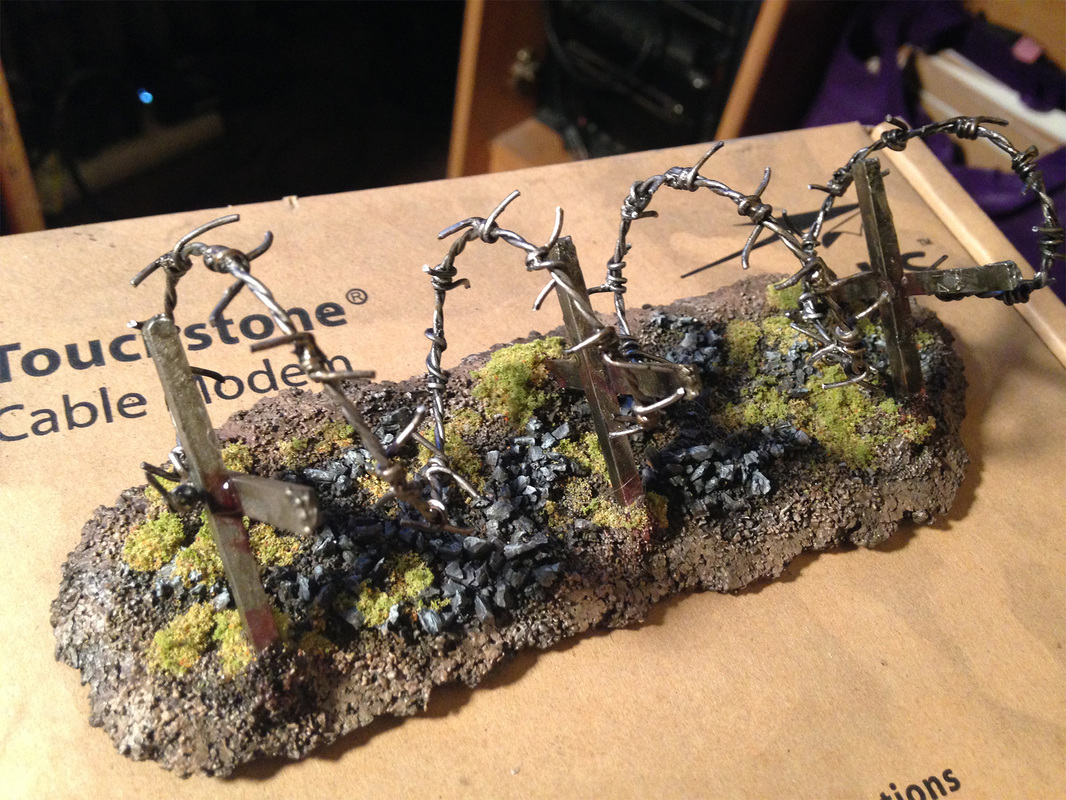
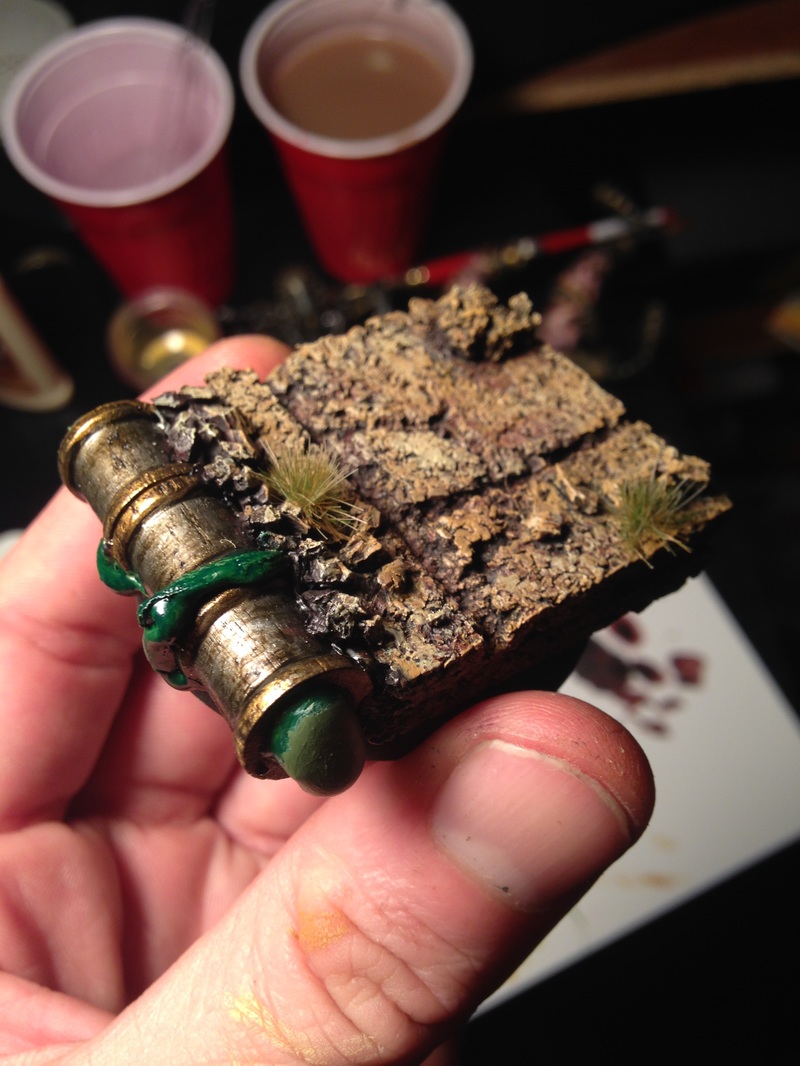
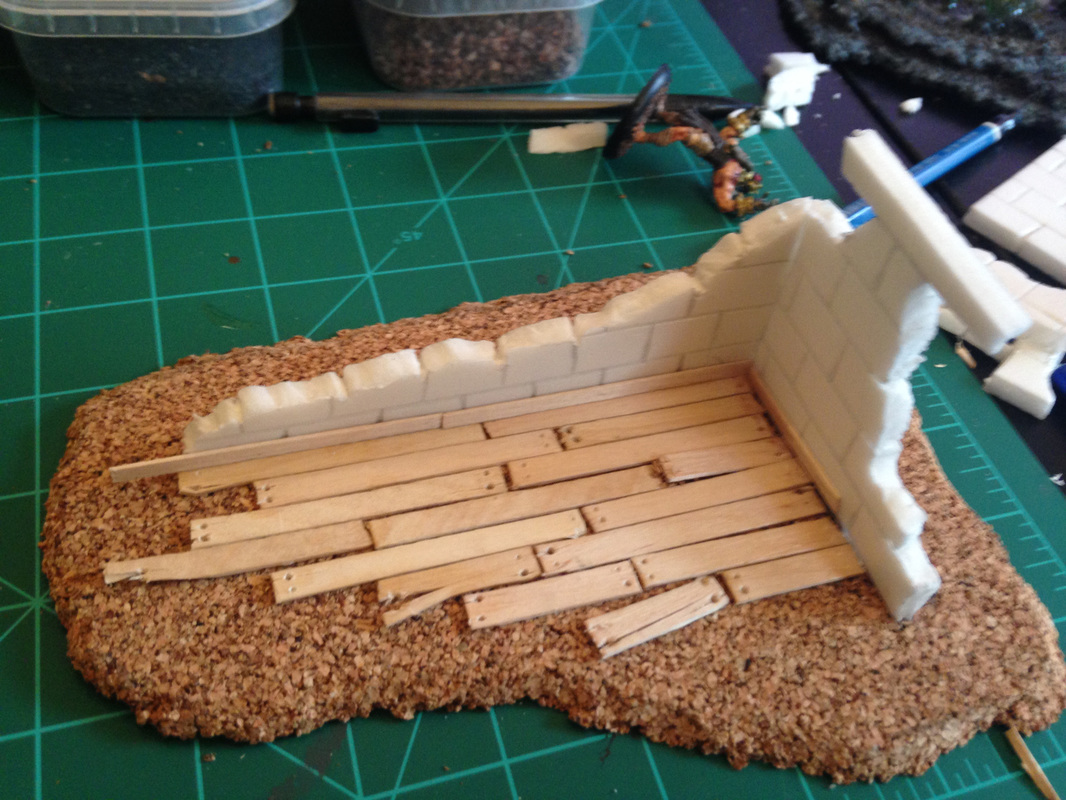
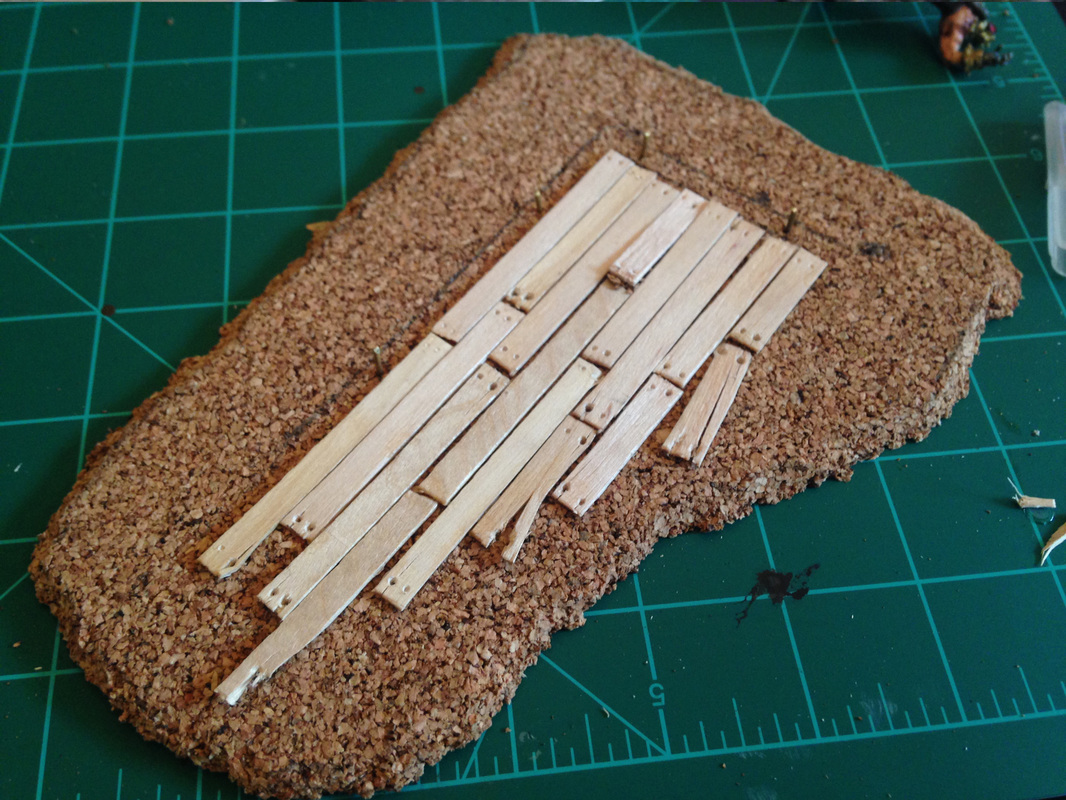
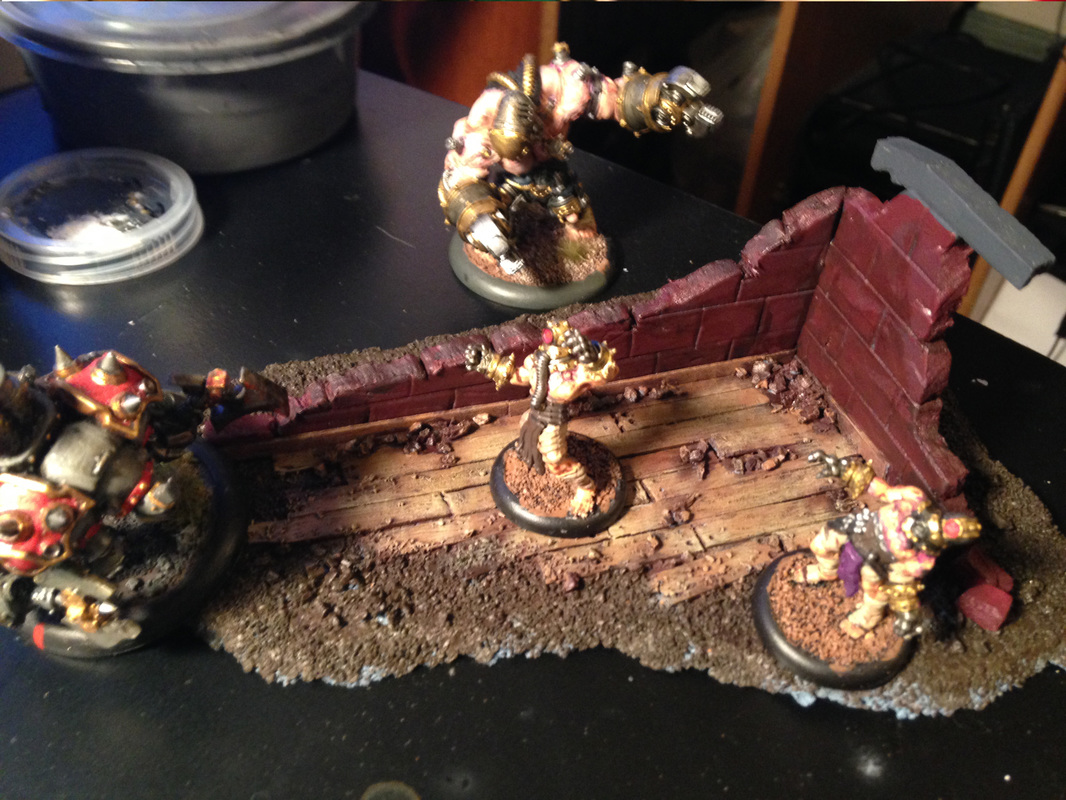
I have been wanting to make a barrier type terrain piece so I used some left over pieces of foam, cork and some wood stir sticks to put this together. 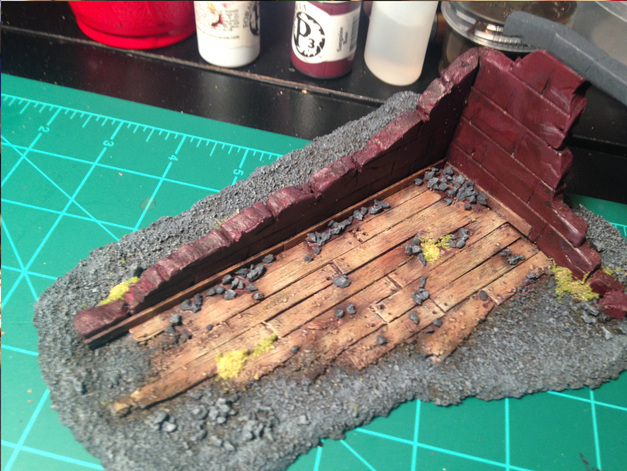 My process here was pretty straight forward. I started by scoring brick onto some appropriately sized foam board. I used two 1/8" thick pieces that were rectangular. I cut the ends at 45 degree angles for the corners to meet. I then cut away and broke off peices to be the size and shape that I wanted the walls to be. I pinned it to the cork board and traced the outline. I then lined the interior with the wood stir sticks which were cut to be approximately 8 ft long in scale. I raised some pieces and made sure there were variations to the placement, trying to make sure the outside pieces were mangled and broken. I scored wooden texture into the wood and pressed divots where the ends met to look like nails.
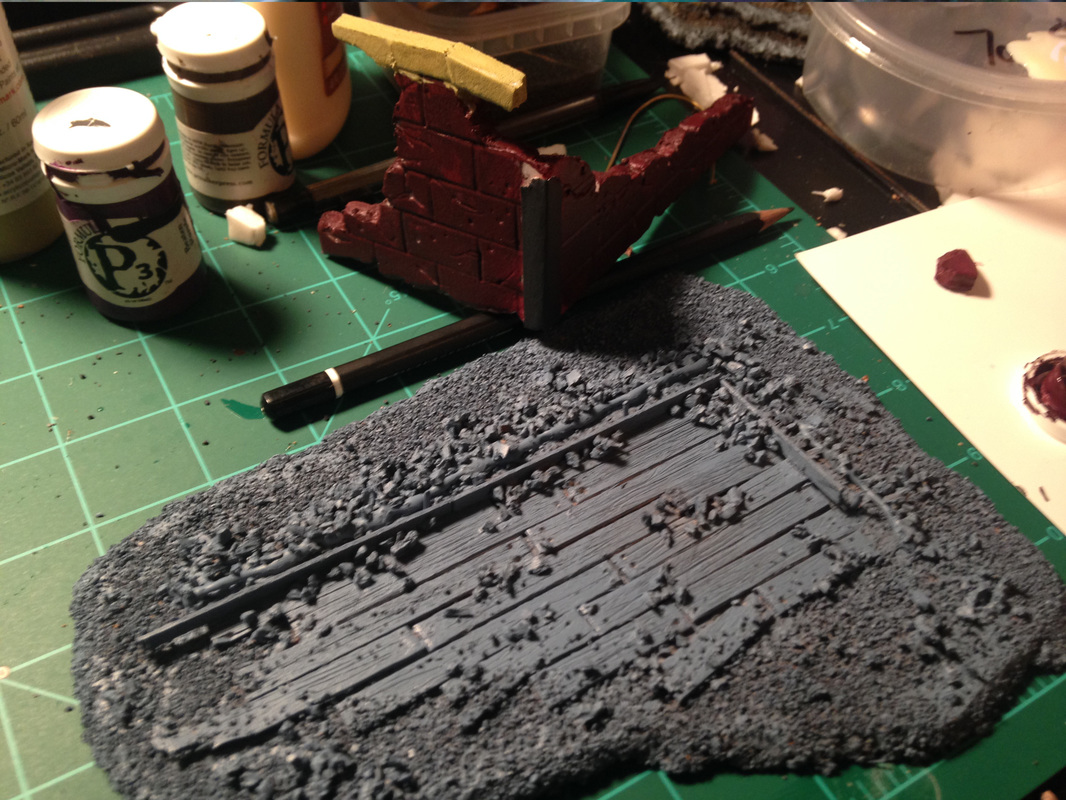
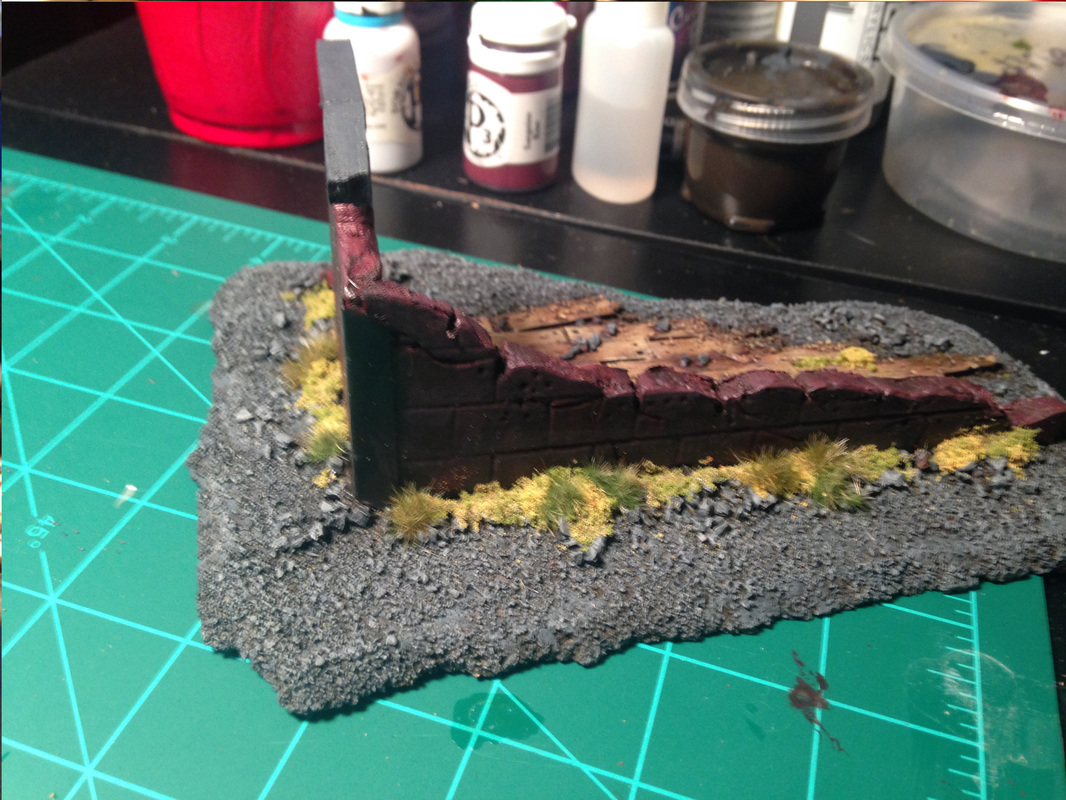
 I took a thin piece of card and created an edge cover for the seam of the building. I covered the base with small sand and rocks, then primed the base and did a quick paint of the foam. I kept the pieces separate as long as I could.
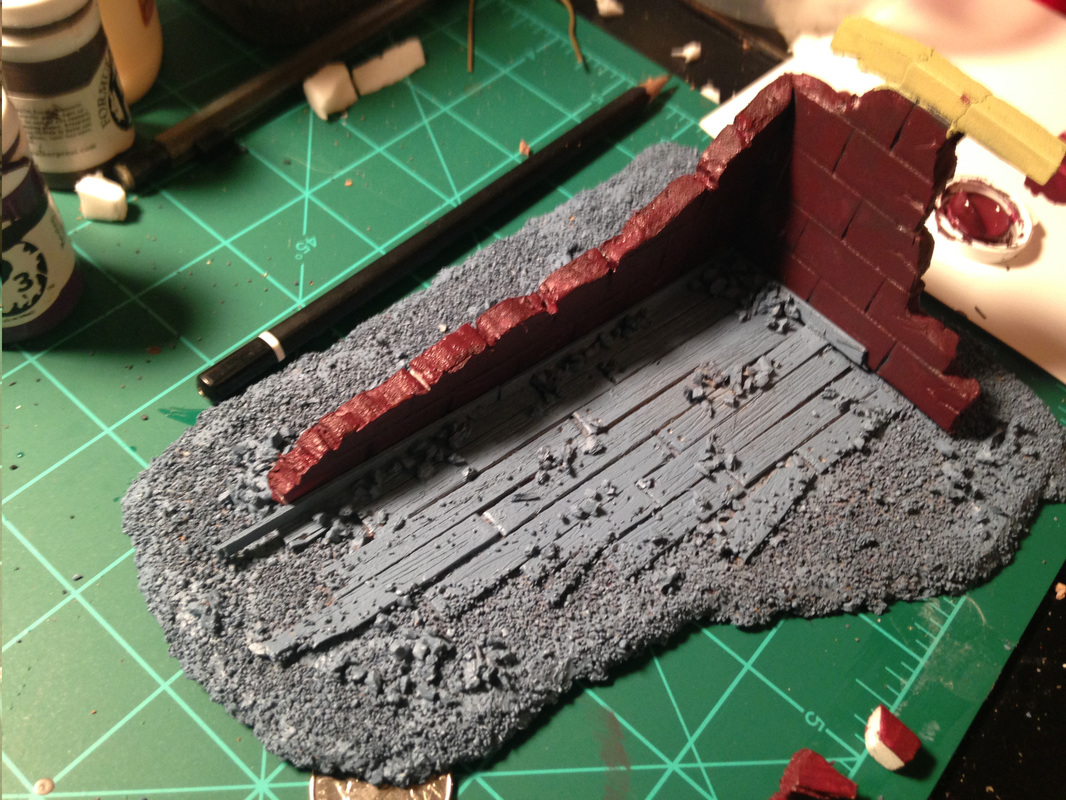
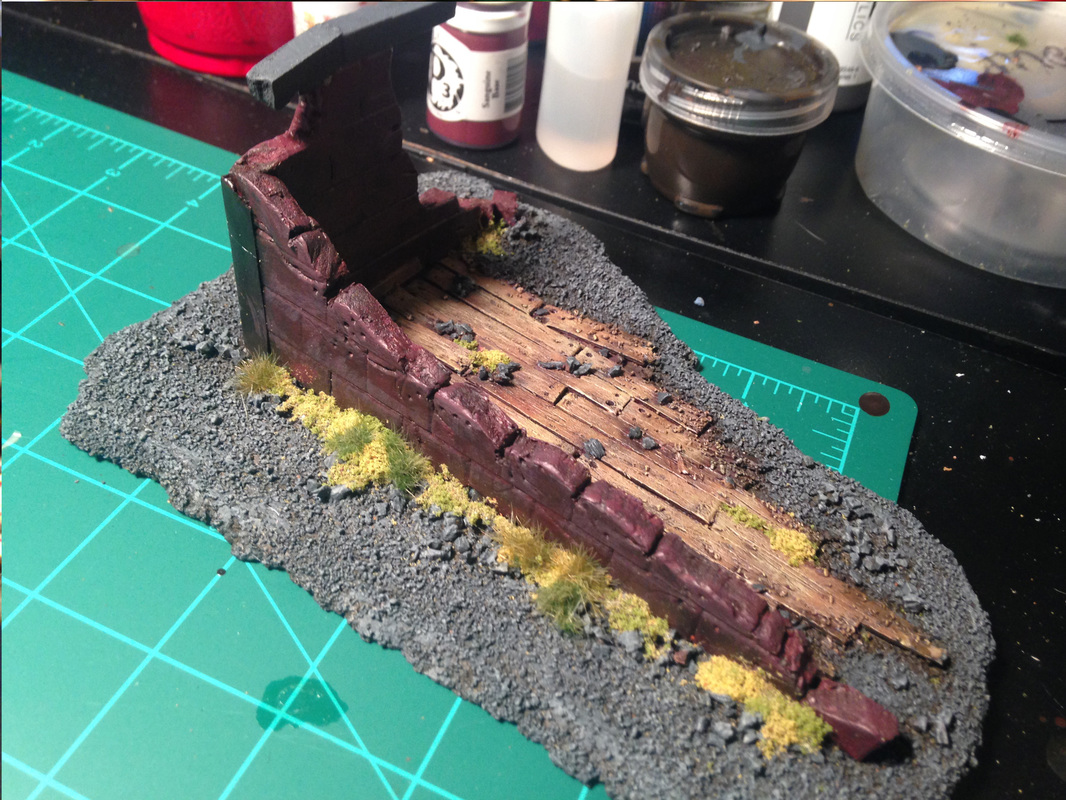
I then did a pre wash of the base. I used a reddish-brown ink for the wood, making sure to get the recesses, and a dark umber for the dirt and seams. 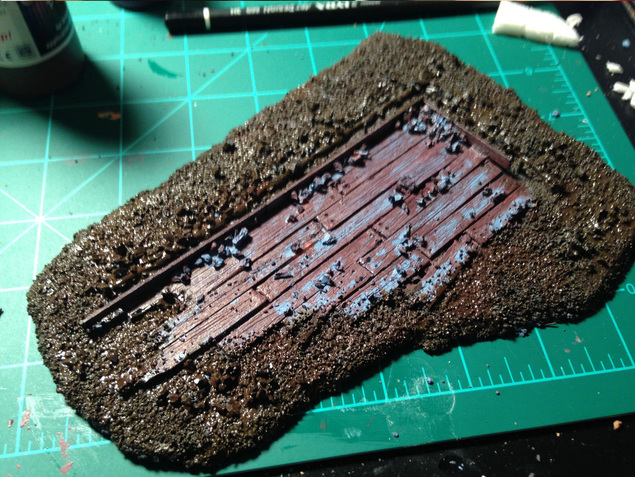 I then washed the bricks and attached it to the base with hot glue. I heavily dry bushed the wood with a medium brown, re washed some areas with umber and sepia for dirty variations and did a final light dry brushing with light browns and bone colors. I did a heavy dry brushing of the dirt areas with a dark grey, re washed areas with umber and sepia for dirty areas then did a light dry brush of med grey. I went heavier on some areas with the med grey to focus attention on some areas.
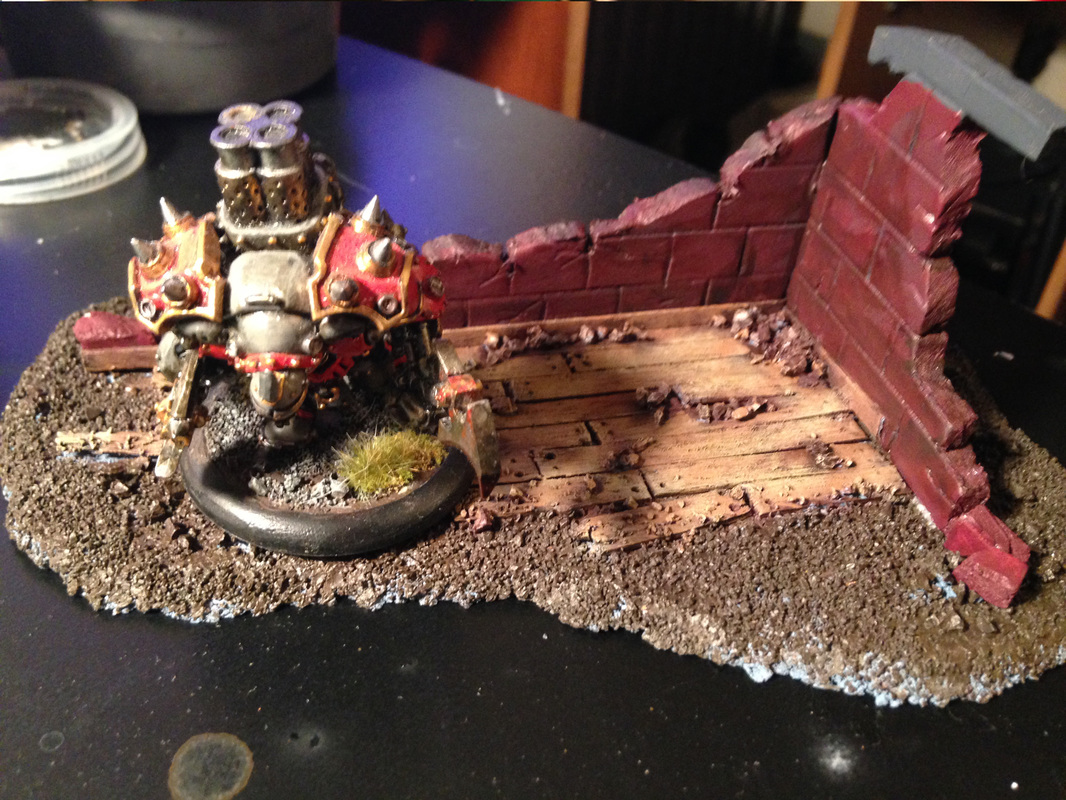
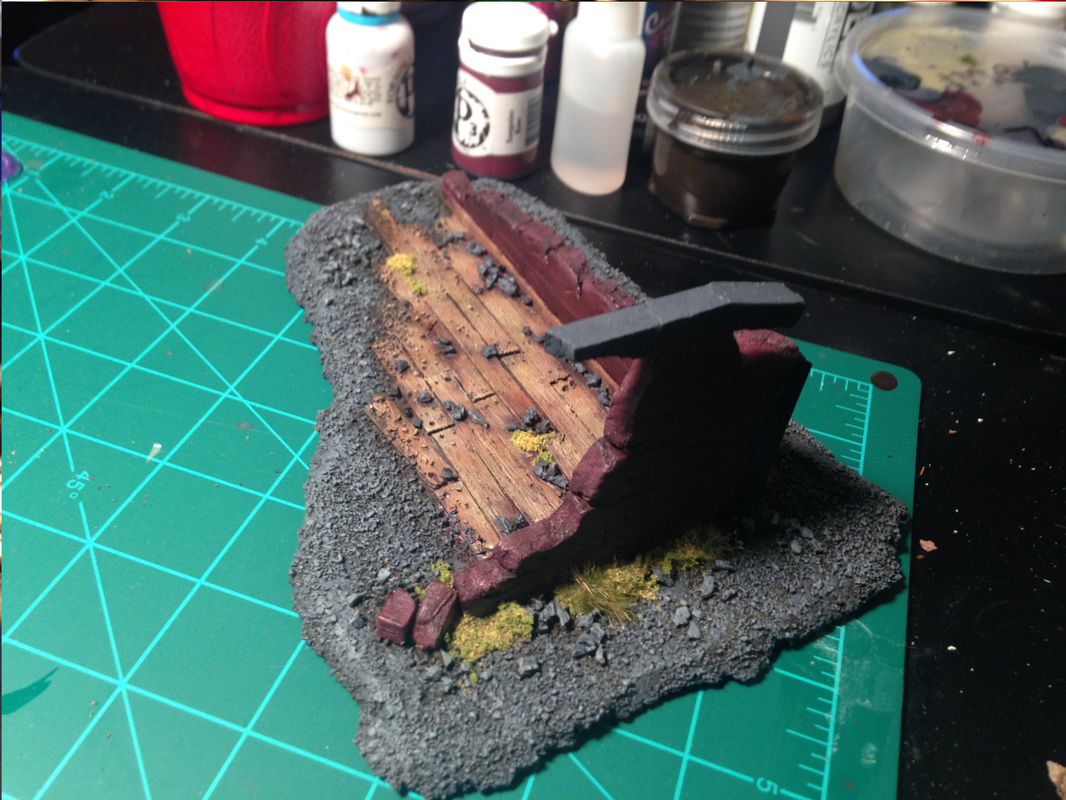
I added some moss and grass around the corners to hide seams and protruding hot glue. I also placed some around the wood in areas that seemed to make sense. Final highlighting and some more grass and this thing is done.
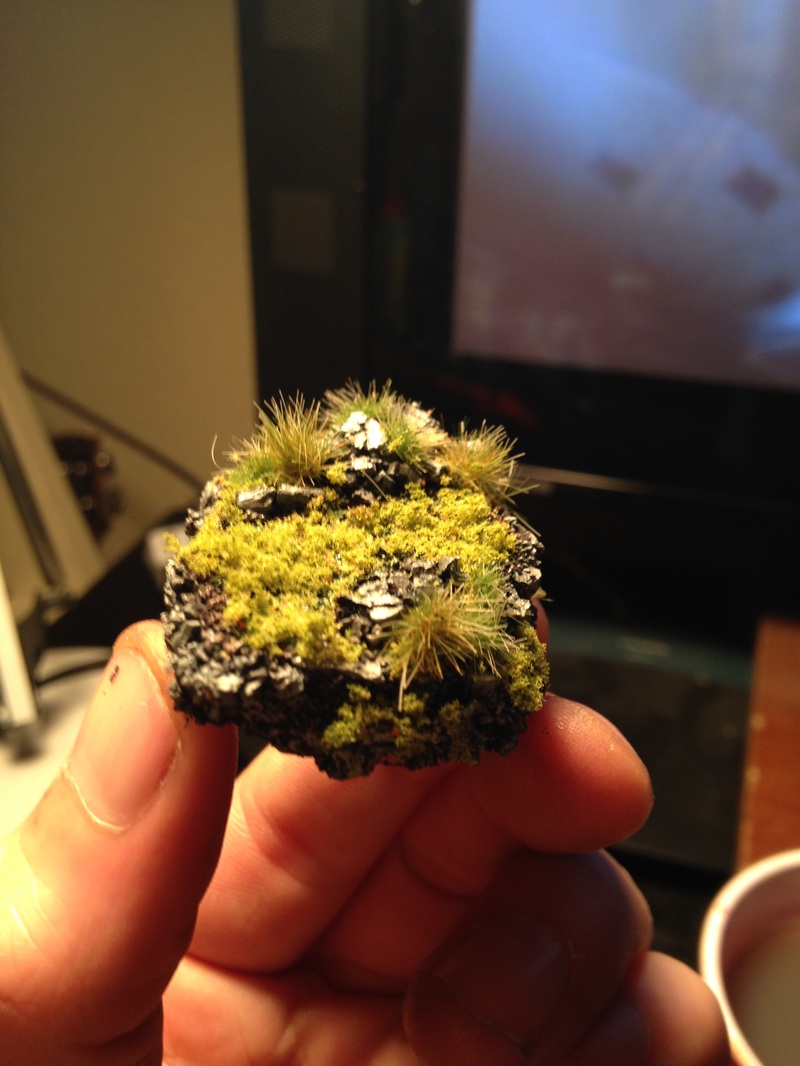
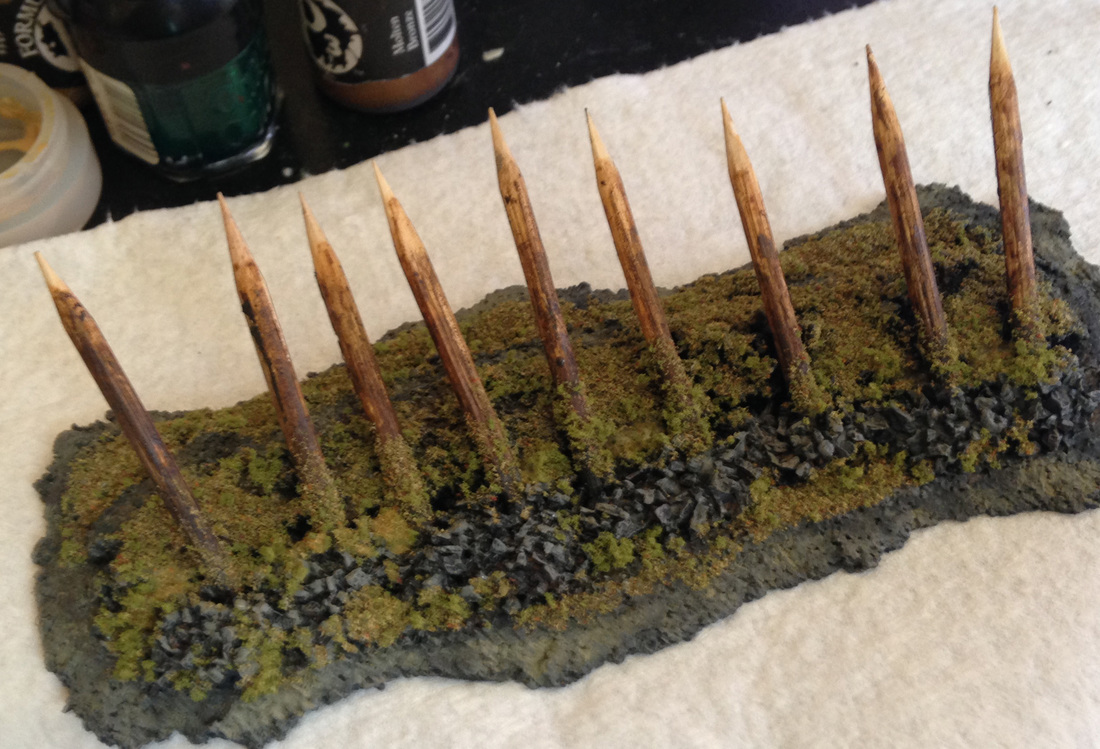
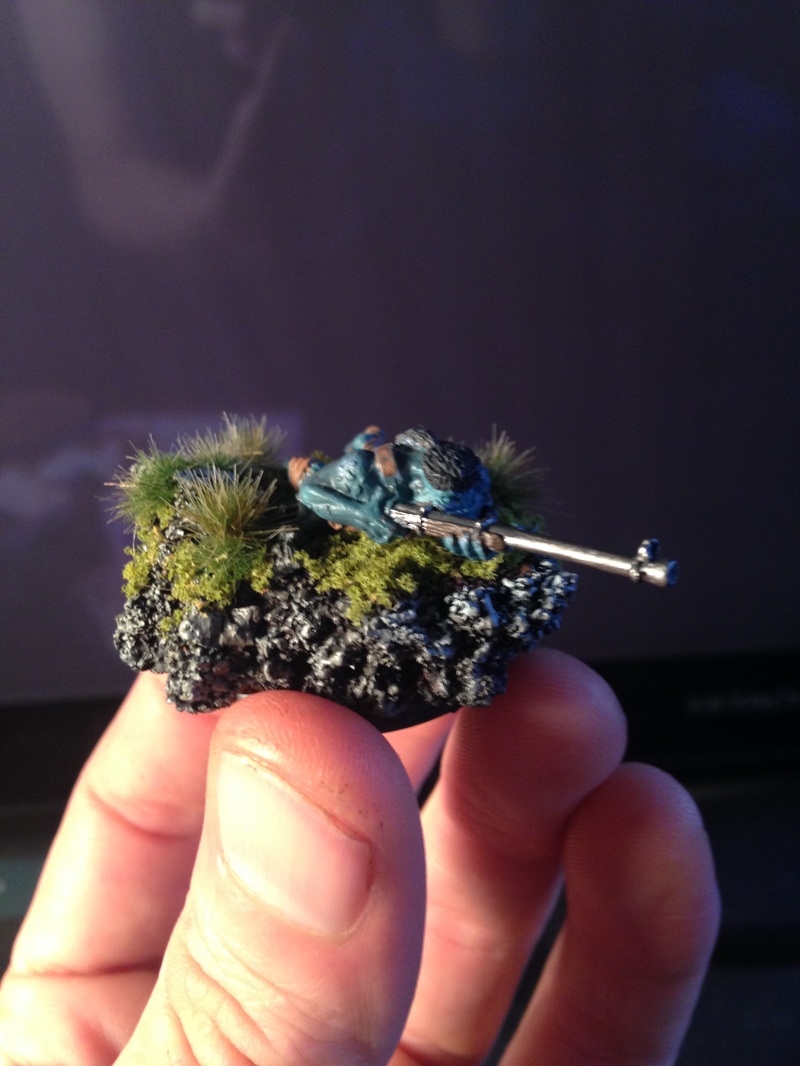
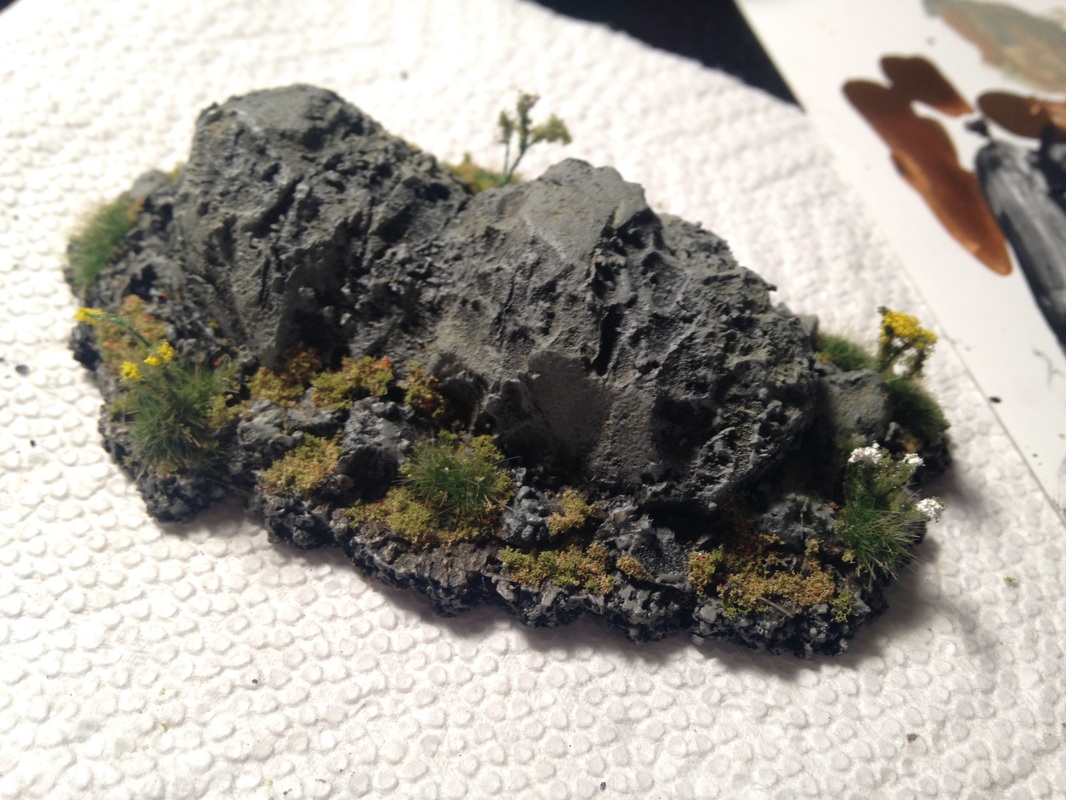
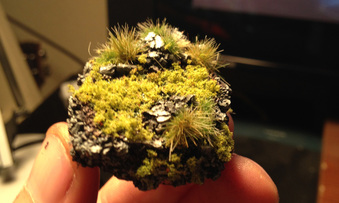
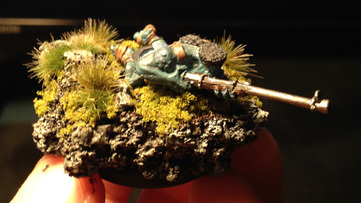
I'll start by saying that I took this entire project, from the concept to the building process, from the Terrain Wench's YouTube series, call "Squig Pit Unscripted Part 1-2." It can be found here: https://www.youtube.com/watch?v=yaf6_9xxJHU I would suggest watching it, it is great. Also follow her channel. I liked the idea of a gated monster pit or corral. I figured it would go great with a Hordes army display. Here's my current progress. 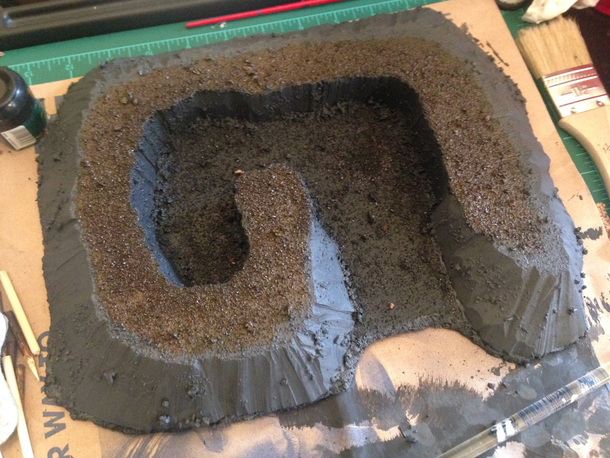 I recently came across a tutorial about using cork board to make a more interesting base for your mini. I liked this process because it was quick, inexpensive and made for some great bases. The same day I watched the tutorial, I went out and bought some cork board and a hot glue gun. I had variations of the rest of the supplies, so I set to work on a mini. I recently purchased a discount unit of Hordes' Pyg Bushwhackers on a whim. I always like them and the Trollblood army, but never really invested in them. After seeing the tutorial I knew exactly what I wanted to do though. This is the finished version of the base and how far I got on the Bushwhacker.
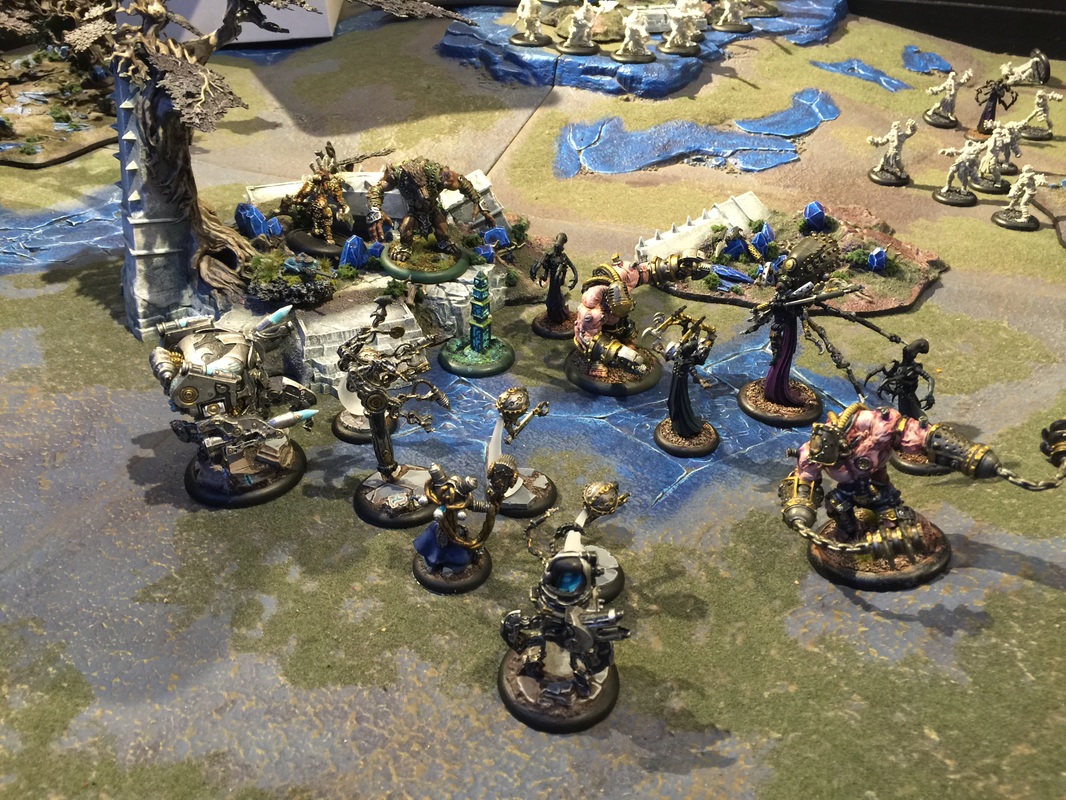
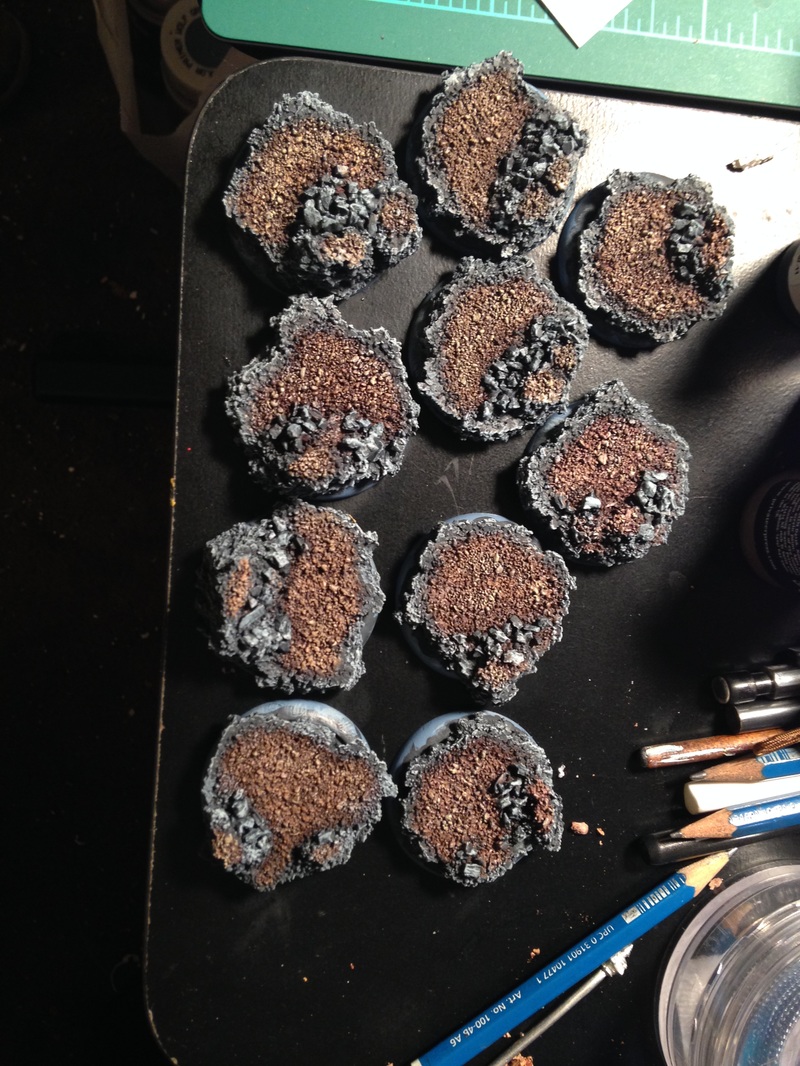
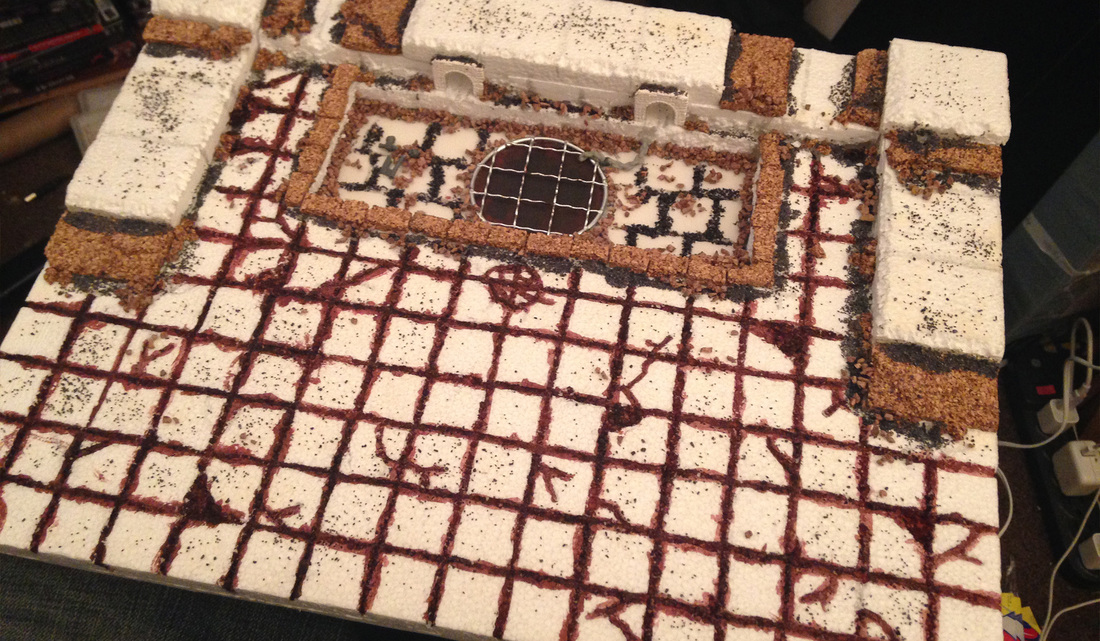
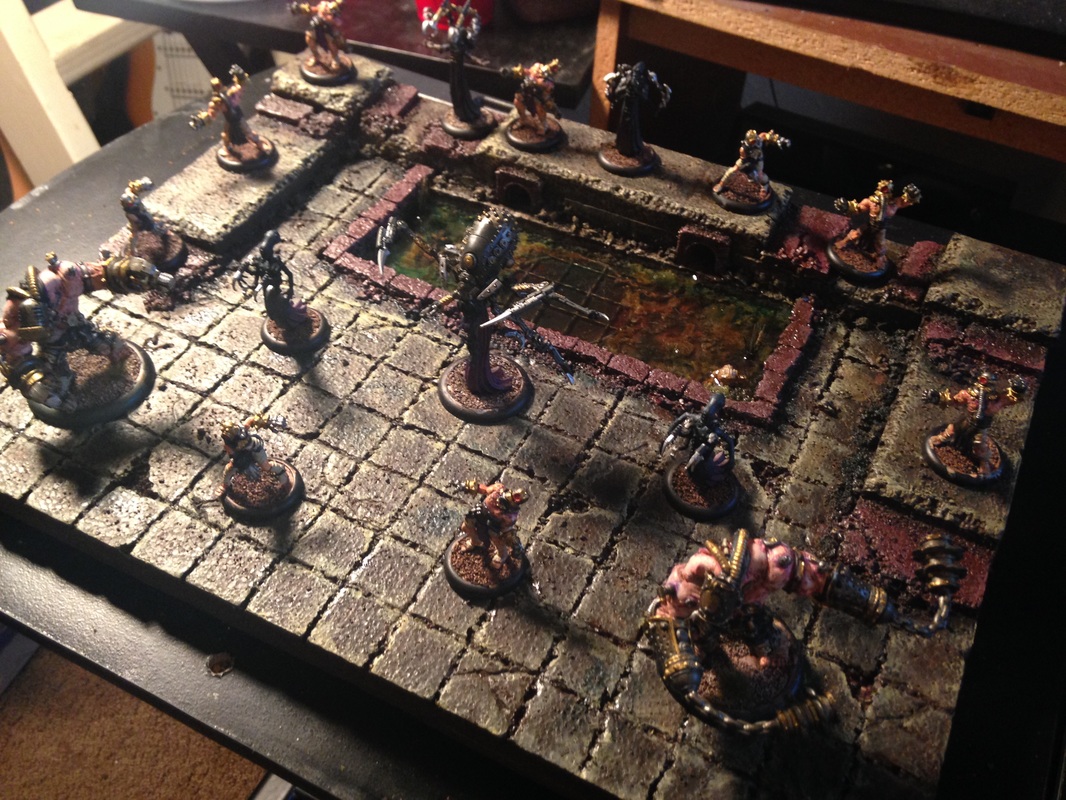
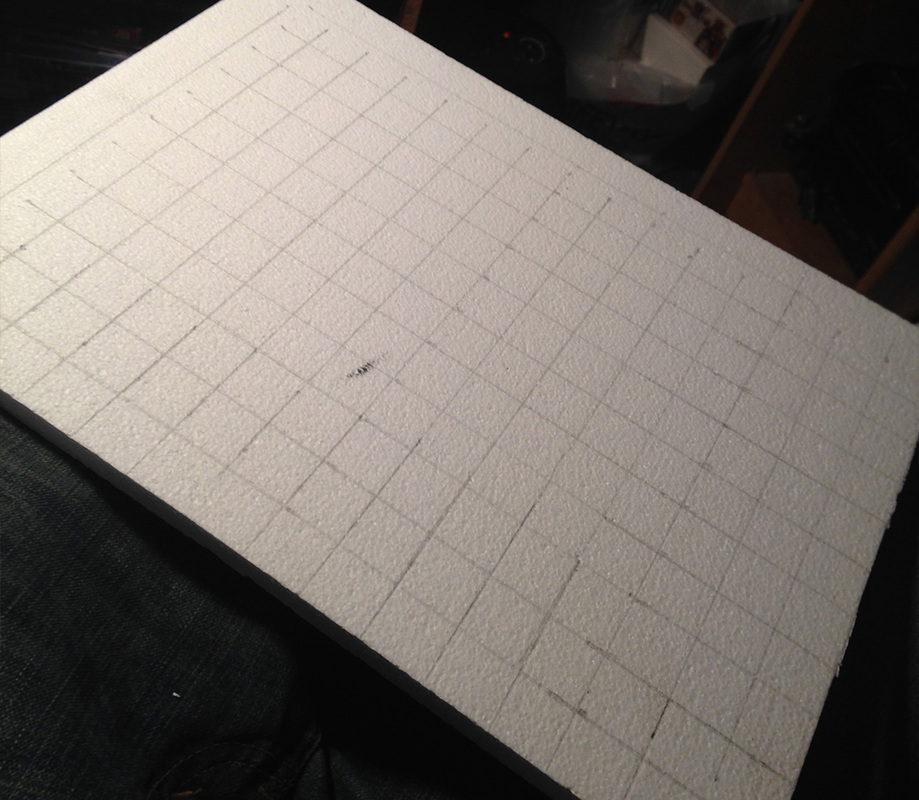
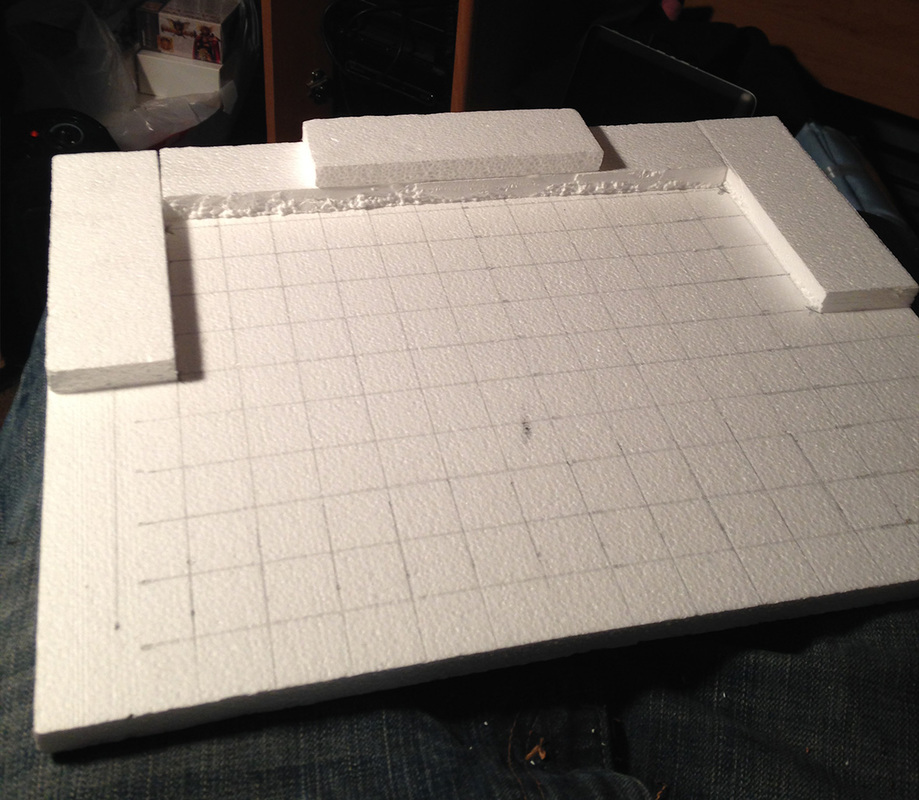
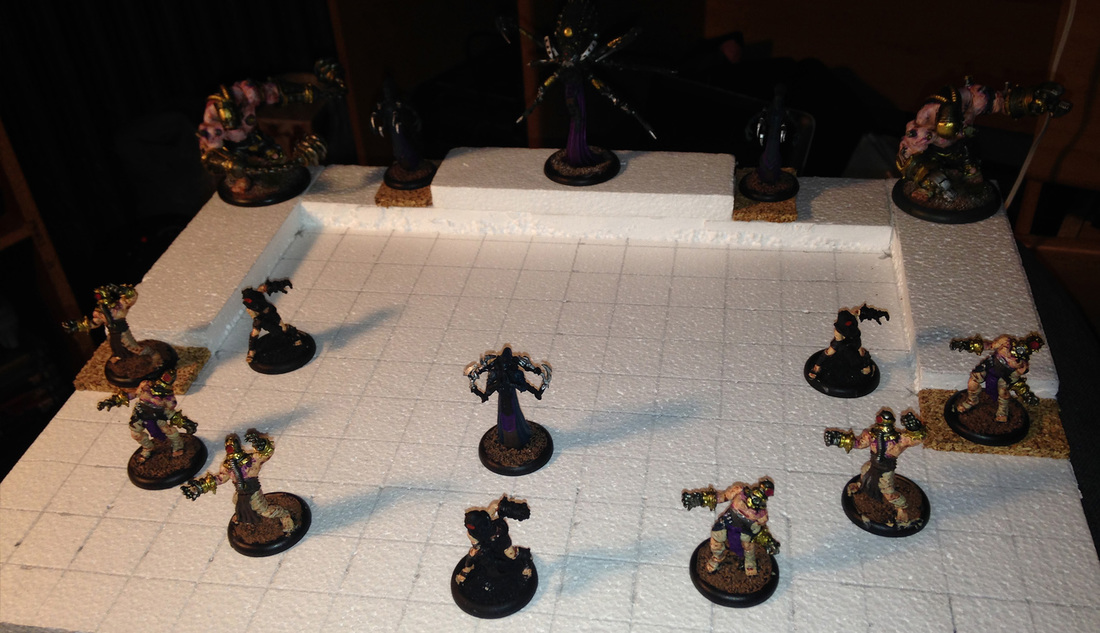
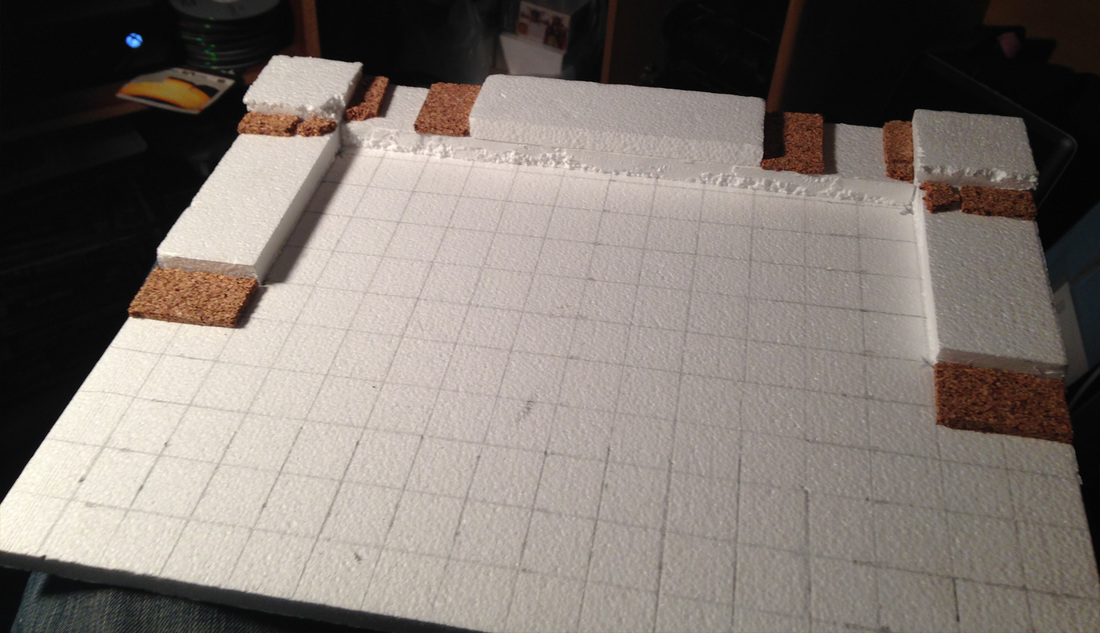
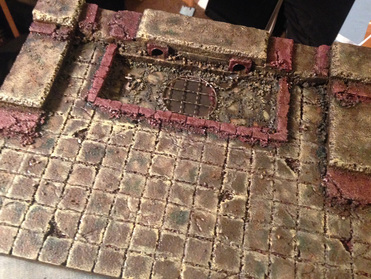
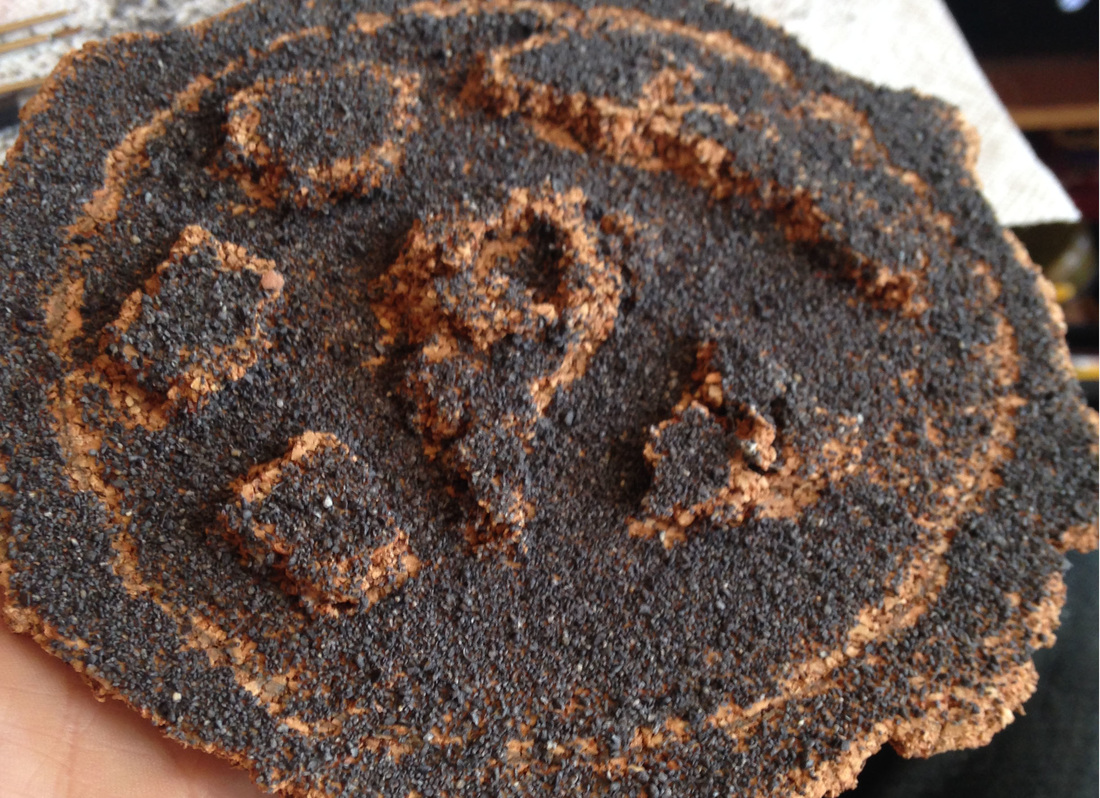
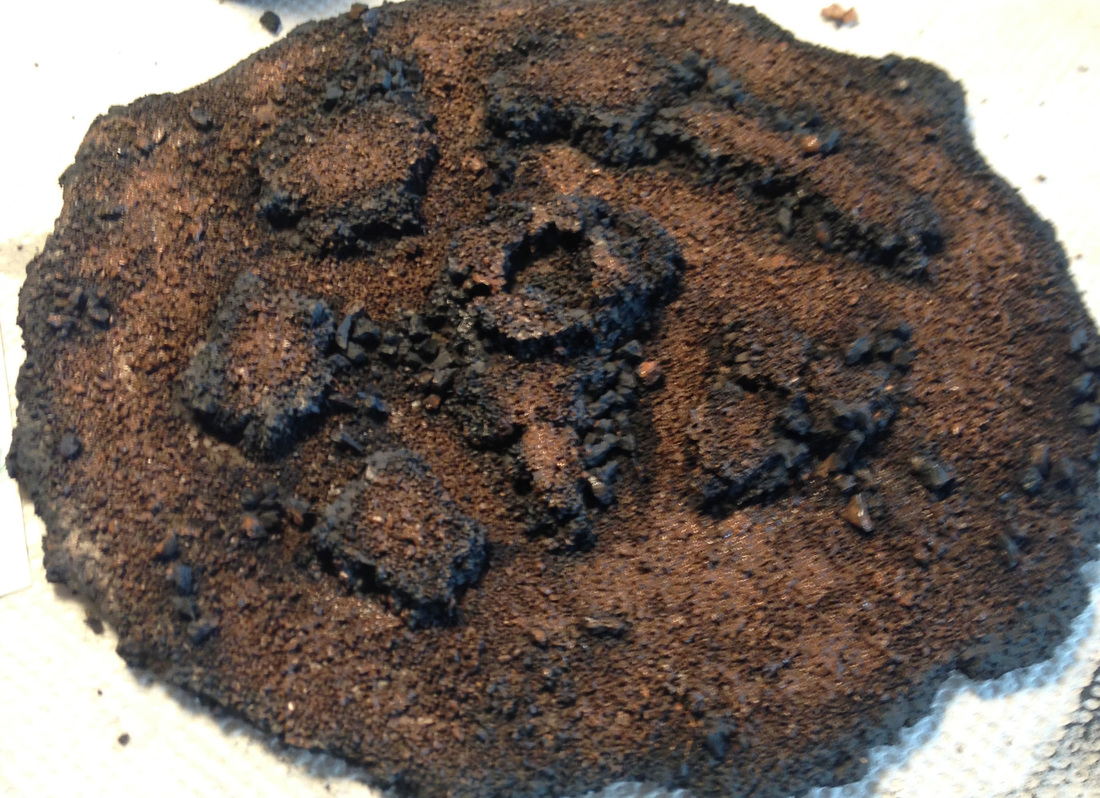
I decided that this was going to be what I did for all my Trollbloods. When I get them that is. I only own the one unit of Bushwhackers and the Merc unit BoomHowler and Co. for now. I use Boomhowler for my Khador and Cephalyx forces but since they're Trollblood, I'm going to give them lush forest floor bases. I want to eventually try snow / ice bases, but one step at a time. I am going to cover making the bases for my ten Boomhowler and Co. models. My process is pretty straight forward. I tear out pieces of cork board that are close to the base size. If you want to play the model, keep the shape as tight as possible. Save the pieces that get torn away. I made my first attempt two or three layers tall. I don't think I'll do this with too many models. Probably just my favorites. For Boomhowler and Co. I just used one layer of cork board. I then paint on watered down wood or pve glue and sprinkle my rocks and dirt on. Agter drying, I drop some super glue in the cracks of the larger rocks that are loose and add more if needed. 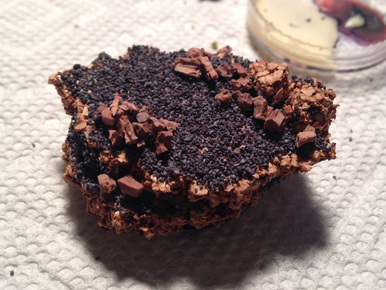 I then primer the base. I used black the first time and it worked really well. I later tried a blue-grey primer and really liked how the lighter primer worked out. So I would now suggest a blue-grey primer. I will say that it does take a bit longer and a bit more paint to get some areas and the crevasse's though. The deep spots became a real pain. So it is a bit of a trade off. Your call. 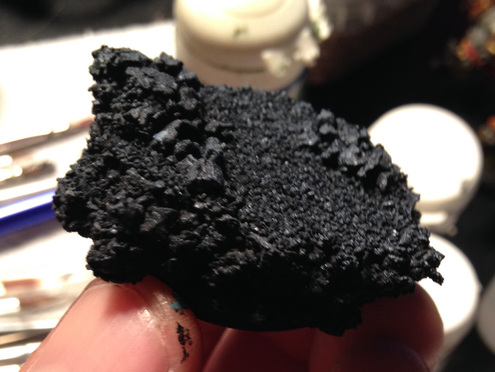 After the primer dries basecoat the gravely areas with a dark brown and the rocky surfaces with a dark grey. I base the larger loose rocks with the dark grey. Adding splotches of a lighter brown can add some variation and mixing a small amount of brown into the dark grey will harmonize the colors a bit. 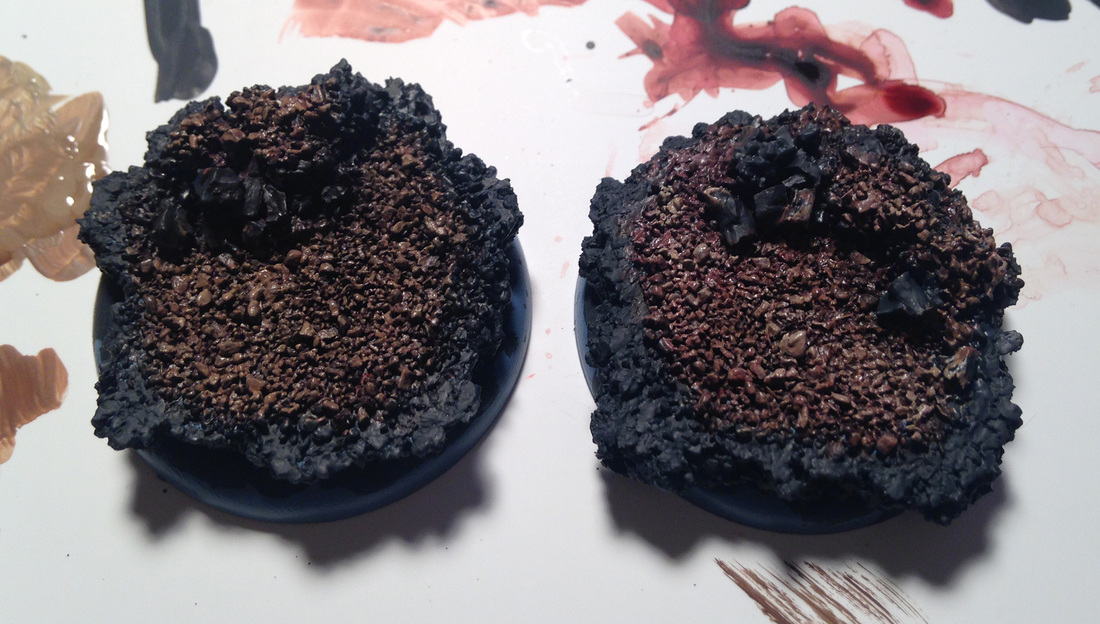 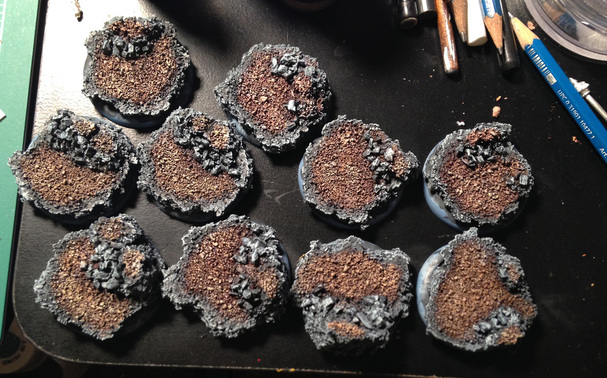 Recently my two Warmachine buddies and I were at a game shop during a Warhammer tournament. I am not familiar with Warhammer enough to know about it's tournaments, but this one seemed pretty legit. About a dozen or so dressed tables, each with an army on either side waiting for the carnage. Easily the most impressive and inspiring aspect for me were the army dioramas. Every player there had some form of scenery display piece, either fully developed and bad ass or in progress and still very bad ass. I knew I wanted to make one for my armies. I figured since I am pretty far along with painting my small Cephalyx army, I would do one for them. Since this is my first, I figured I'd start small. A simple horse shoe shaped display table. Cephalyx are sewer dwellers, so the environment was pretty obvious. I figure a little area with a sewer drain would be pretty straight forward and give me the chance to try some water for the first time. Here's where I am currently at with it:  Like I said, this is my first attempt at something like this so I was trying to keep things as easy as possible. As a side note, I have watched a ton of tutorials about scenery technique and process which I wont go into detail about on this blog. I have combined some and taken some directly step by step. There is a wealth of knowledge out there, so if there is a step that you want to know more about, look it up or contact me directly. To start, I set about scoring tile onto a large sheet of foam board. I found some smaller grain foam board at a model train shop, cut it into a smaller (12" by 16") board and drew on the (1" by 1") tiles with a pencil. Once the base floor was scored, I measured one (8" by 2") section and three (6" by 2") sections and glued them in a horse shoe around the edge of the foam board. One of the (6" by 2") sections was used to make a raised up area along the back wall for the leader of the army, Exulon Thexus.
I then cut (2" by 1") and (2" by .5") stairs from 1/4" thick cork board. These seemed like a nice height for stairs and I would be able to place models on the (2" by 1") stairs. I would suggest always putting miniatures on your scenery to test it for composition, integration and stability while you are building it. It is both inspirational and can save you some time making something that doesn't end up supporting your models. I decided that I wanted the Monstrosities to be raised up a bit, so I added stepped platforms to the corners for them to stand on.
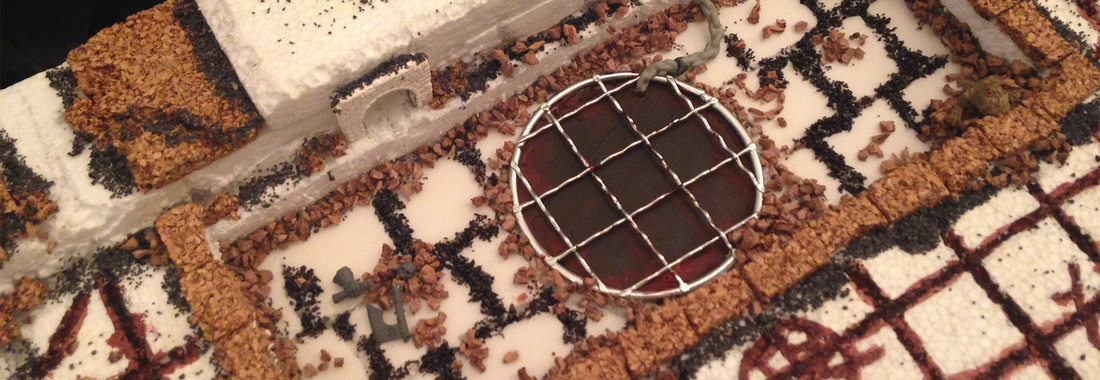
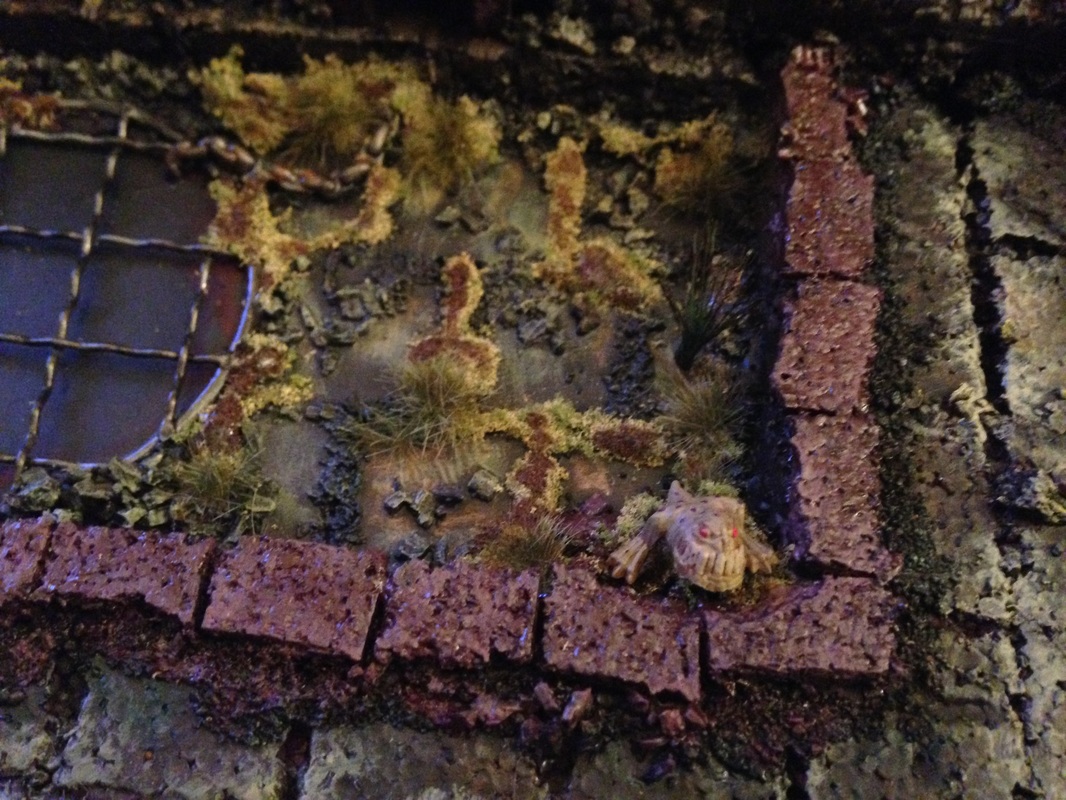
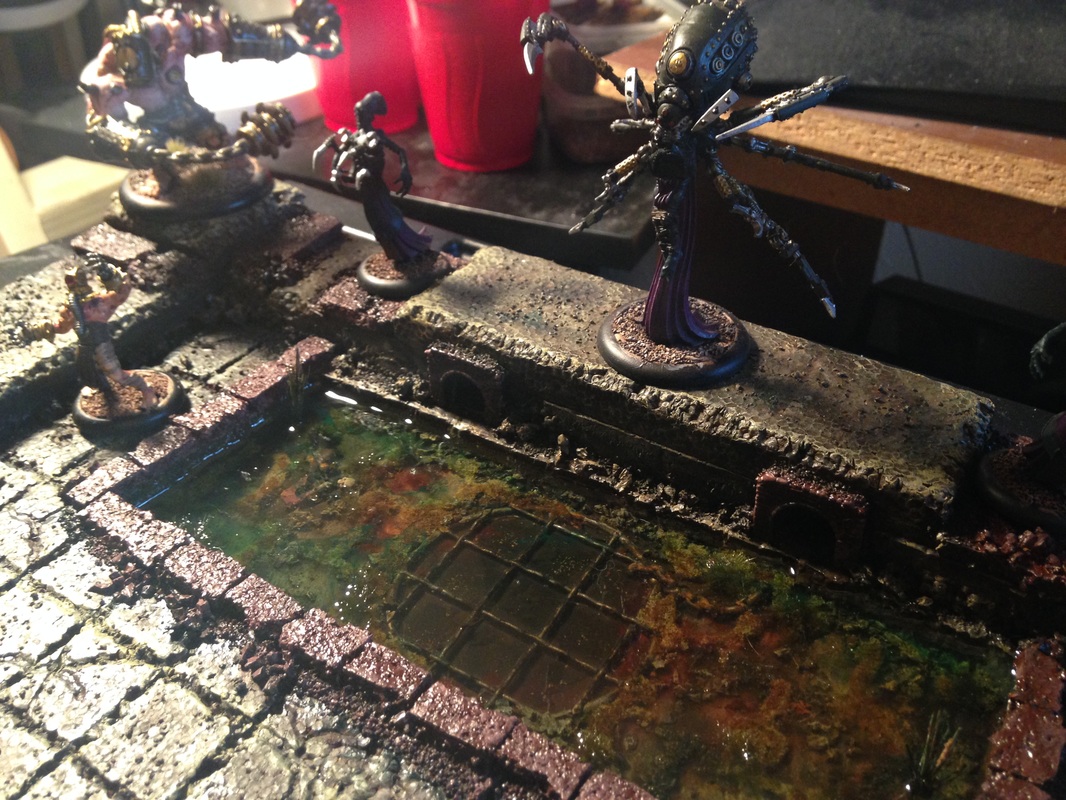
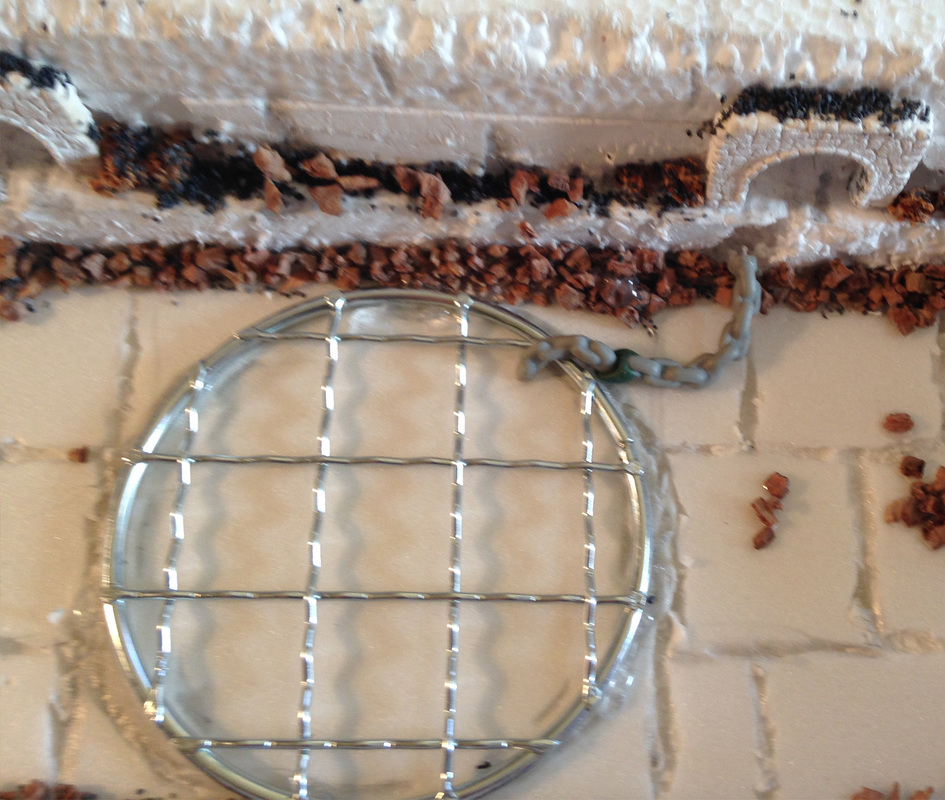
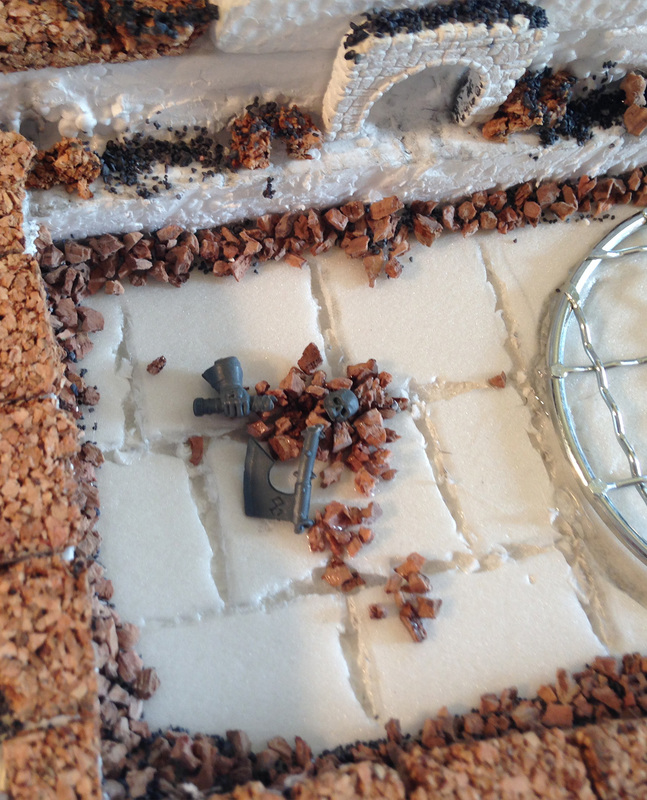
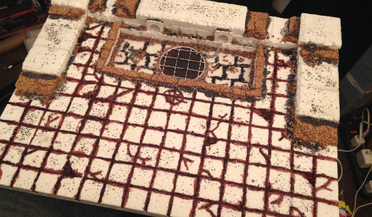
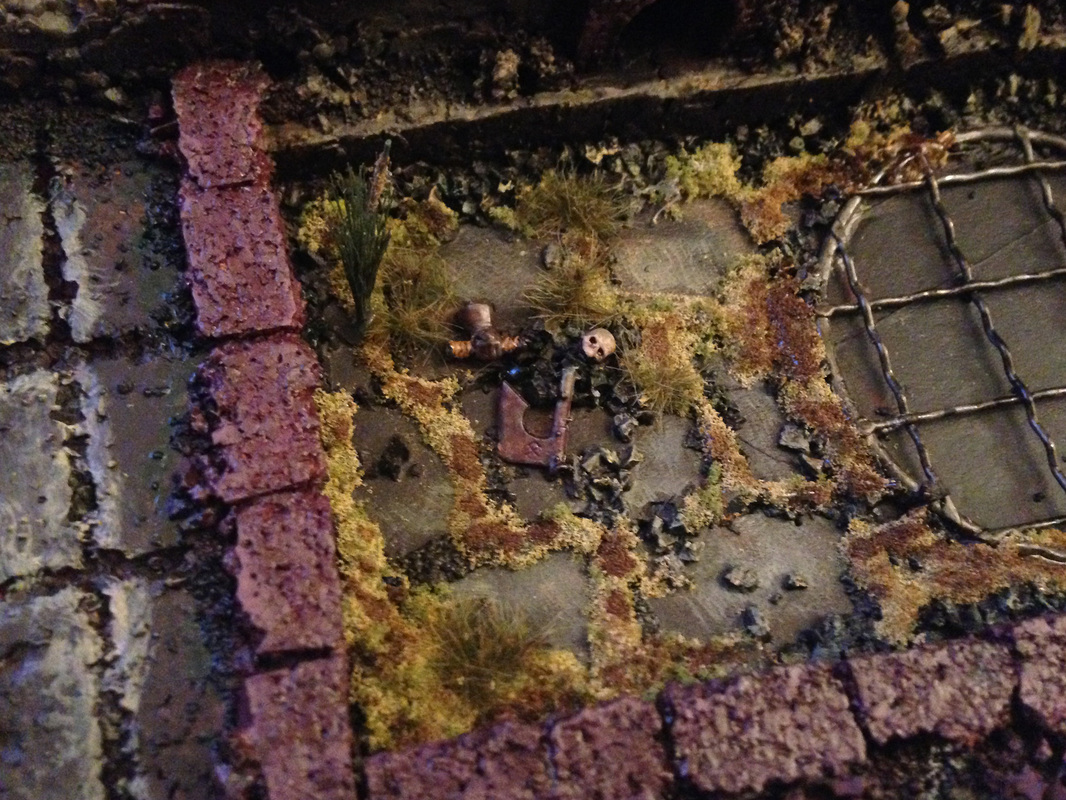
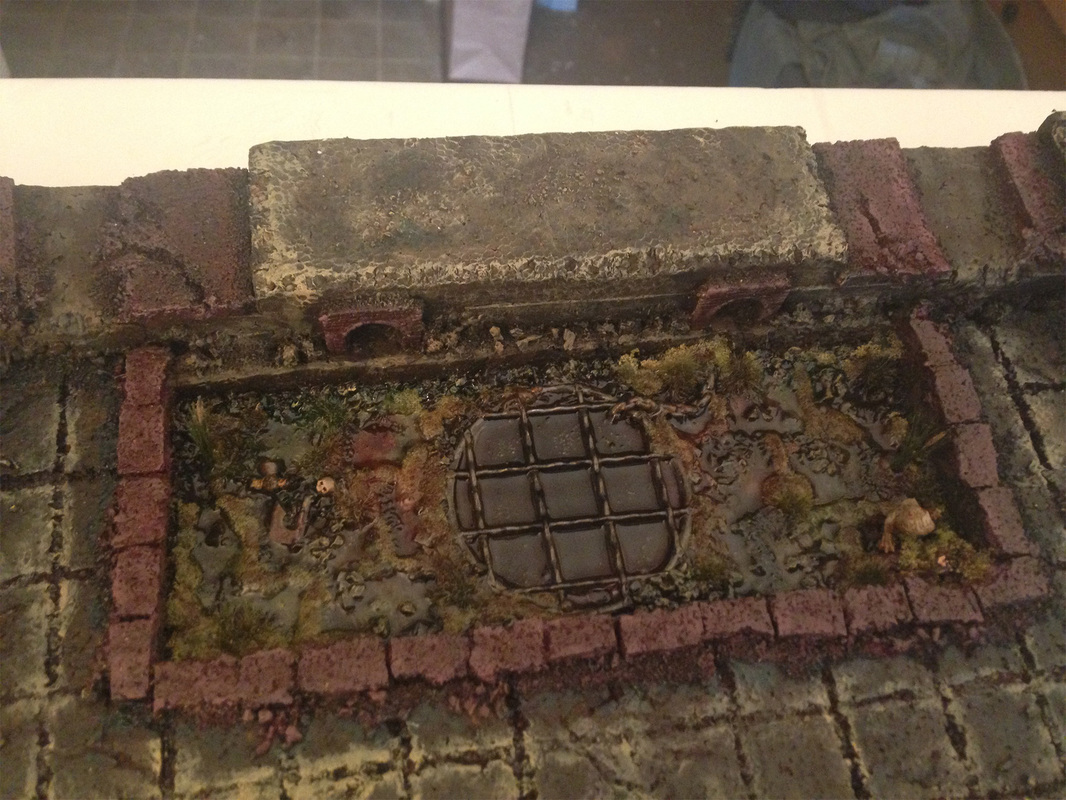
I then blocked in where I wanted my drainage area to be with pencil. I roughed up the edges of the walkways and gouged out the borders of the tiles as well as created cracks and chipped tiles. 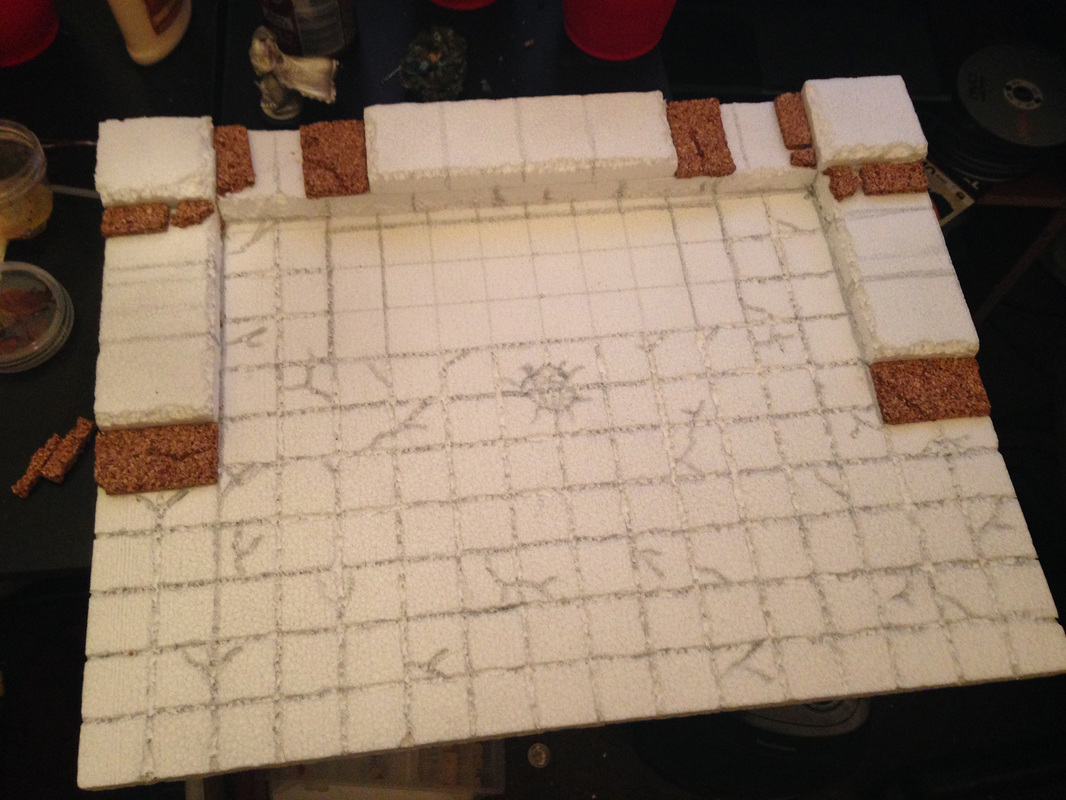 At this point I had done some work but had forgotten to take photos. To recap, I cut out the drainage area from the base floor leaving a small ledge against the back wall. I then glued the entire structure onto another (12" by 16") foam board. The under board made it possible for me to have a floor to my pool. I lined the seam of the pool's floor and walls with hot glue to seal it for the water poor. I then covered the glue with small rocks for cover. I found small retaining walls at the hobby train store which worked well for the drains. I cut out a hole to add depth to them and glued them to the walls. I cut apart cork board into small brick shapes to line the edge of the pool. I painted a watered down glue mixture all acros the floor and sprinkled small amounts of rocks and sand all over. I used pieces of cork, battlefield rocks and sand to line the walls and make it look like crumbled bits around the stairs and pool lining. I broke up the floor tiles a little more and carved tiling into the pool's floor. 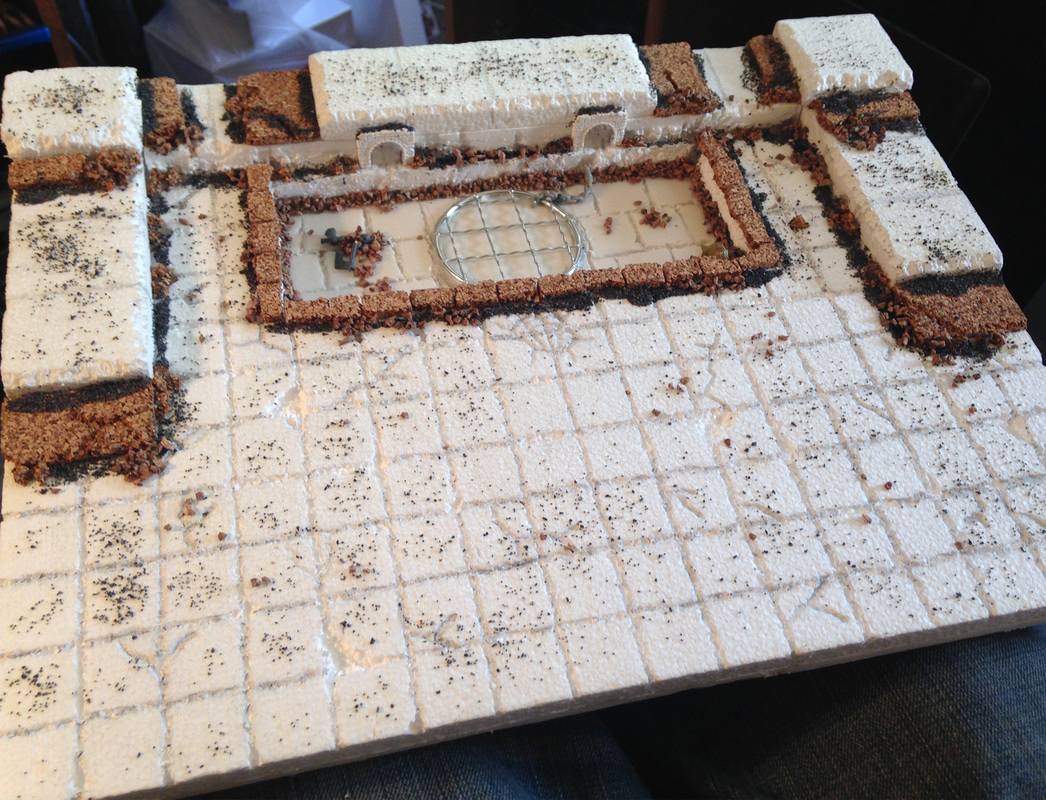 The part that became the most fun was filling the pool with items. I like it, cause it adds character to your space and creates little stories in your work that you hope people will see and pick up on. 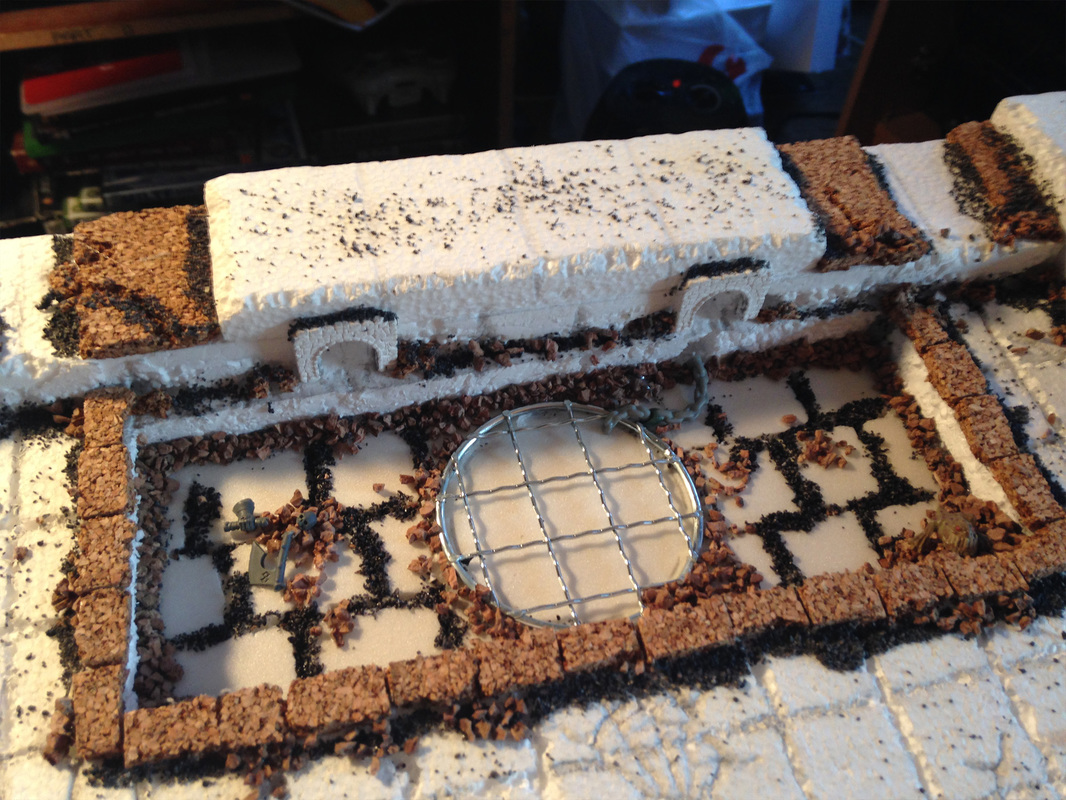
I used a watered down wood glue painted all over the surface, and sprinkled rock on top. After all the rocks and debris was dry. It was time to paint.
 My next step was to base with a dirty brown paint. I used a large brush and covered the whole thing. I tried to not paint over the cracks and recesses, but I didn't mind if I covered some of the washes. I used a sponge to apply lighter and darker browns for variation. I re shaded cracks and corners and added dirty variation around the tile. I did a medium dry brushing of the edges of the tiles and walls with a moldy ocher and bone paint mix. For the brick work I used a dirty red paint and washed mostly with the reddish-brown and sepia washes. For painting techniques watch the Terrain Wench YouTube series. 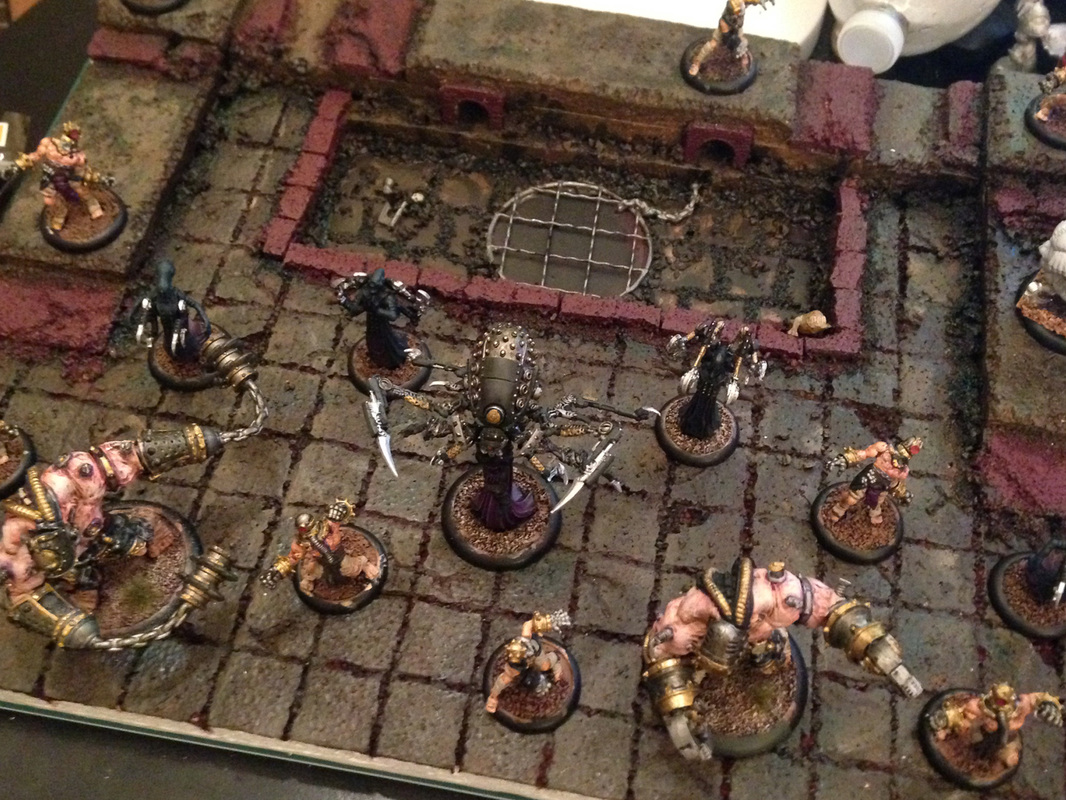
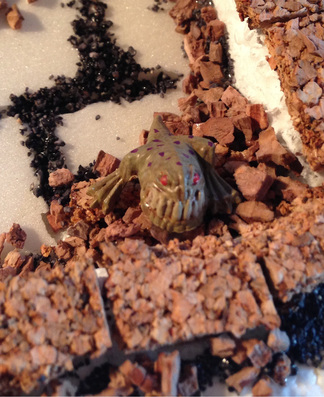
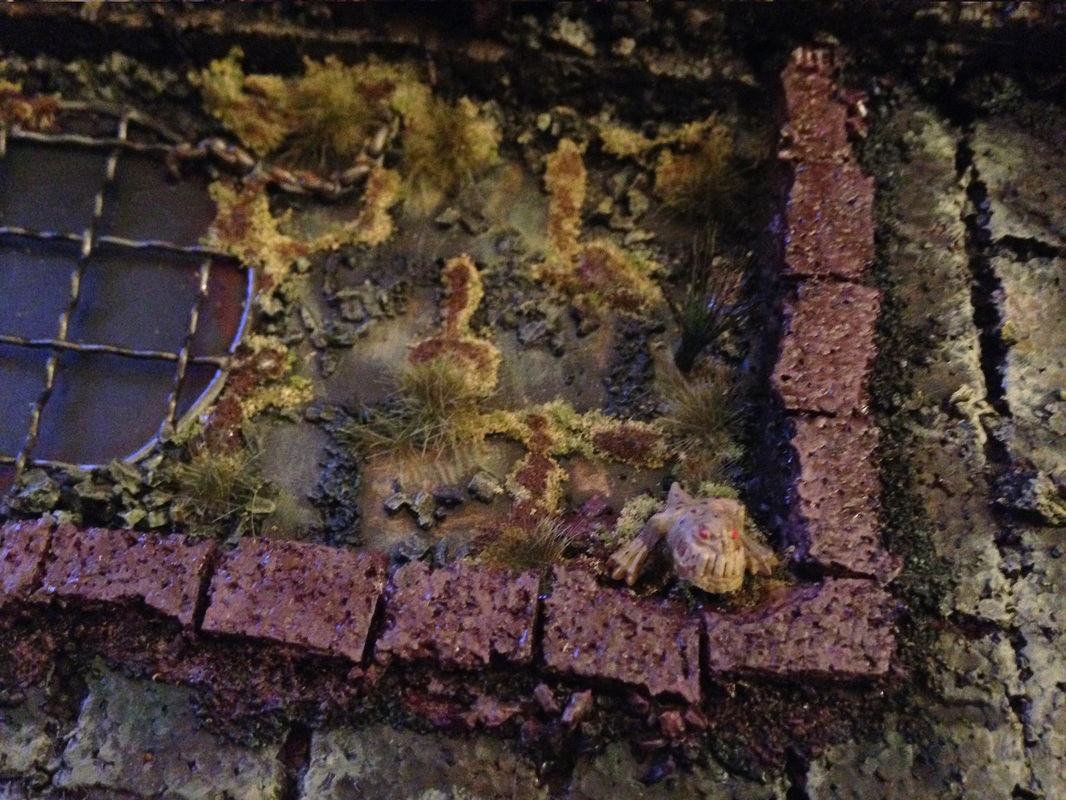
I have been wanting to do the water for a long time, so at this point, I figured I would deck out the pool. I laid down an extra layer of hot glue in the edges and filled any hole's made by the super glue I had used to really seal the piece. I would lay down a line of glue then quickly attach flock for mossy areas. I super glued standing grass and the plant. I glued the baby squig into place and finished painting anything I could see. After the water is poured, that's it for the base of the pool. I dropped brown washes in splotches on the moss, grass and plants for color variation and made sure to rust up the metals a bit. 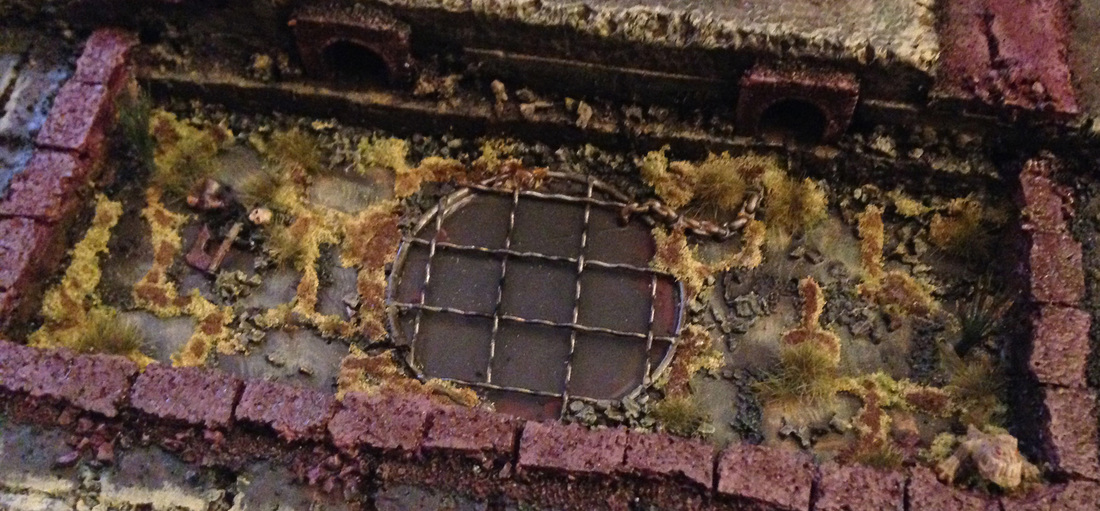
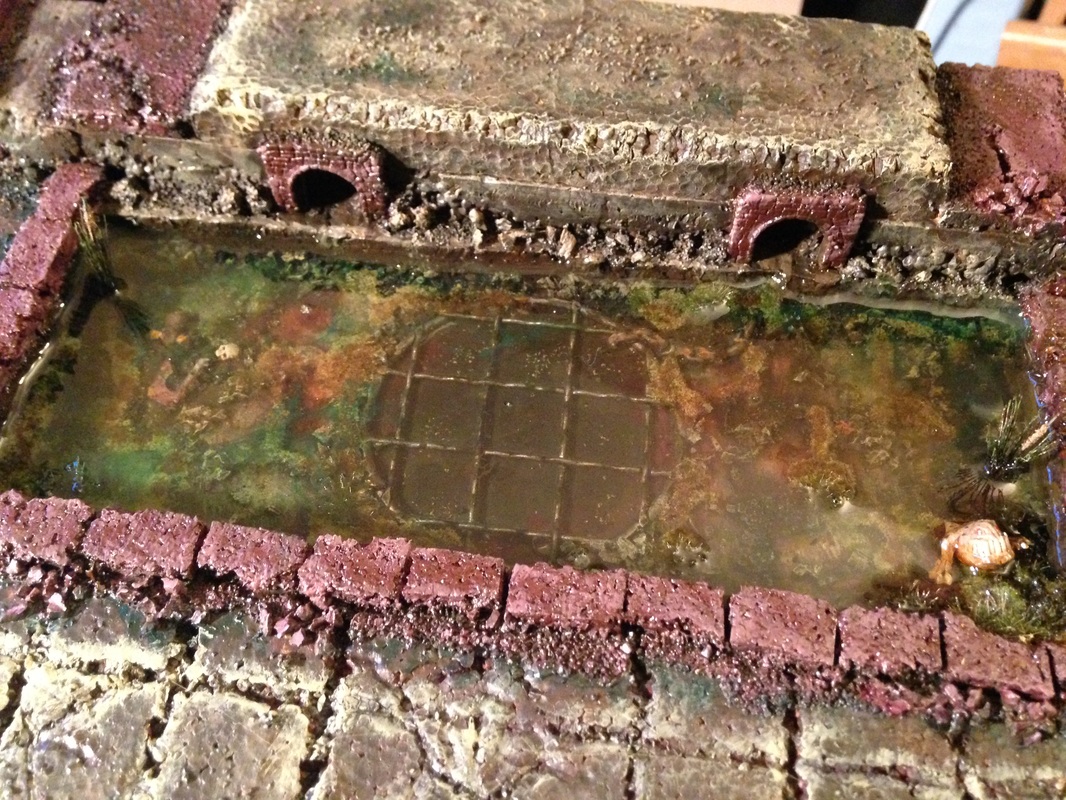
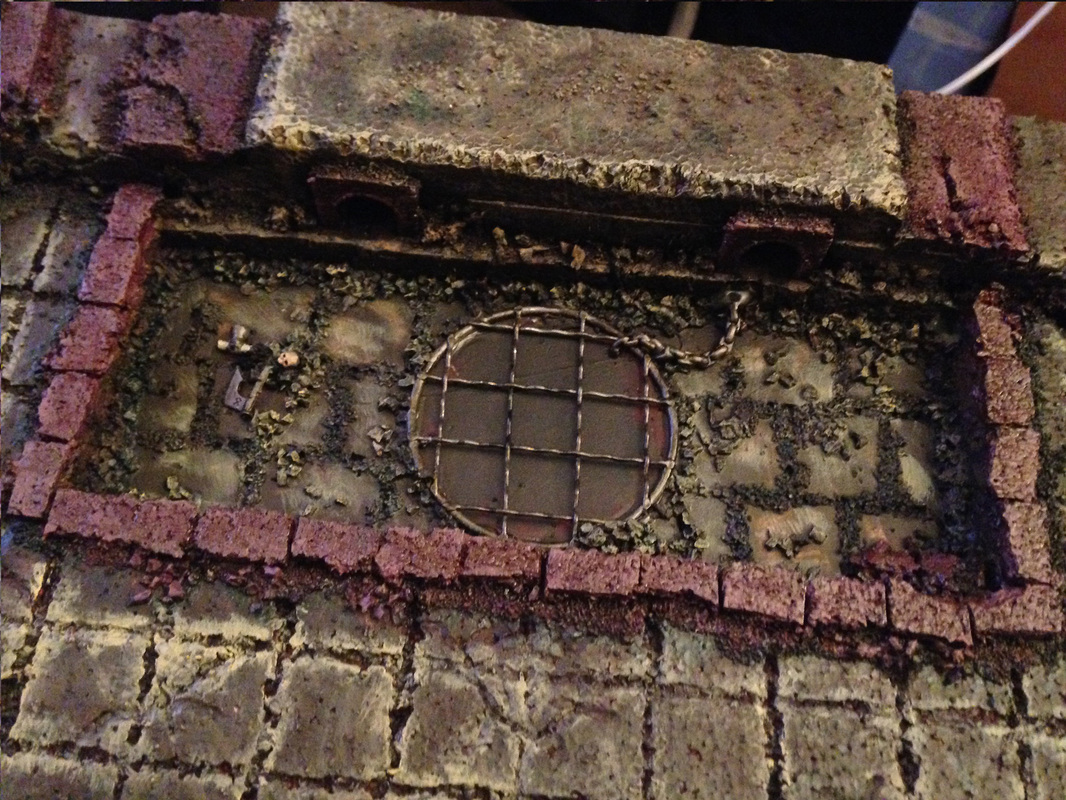
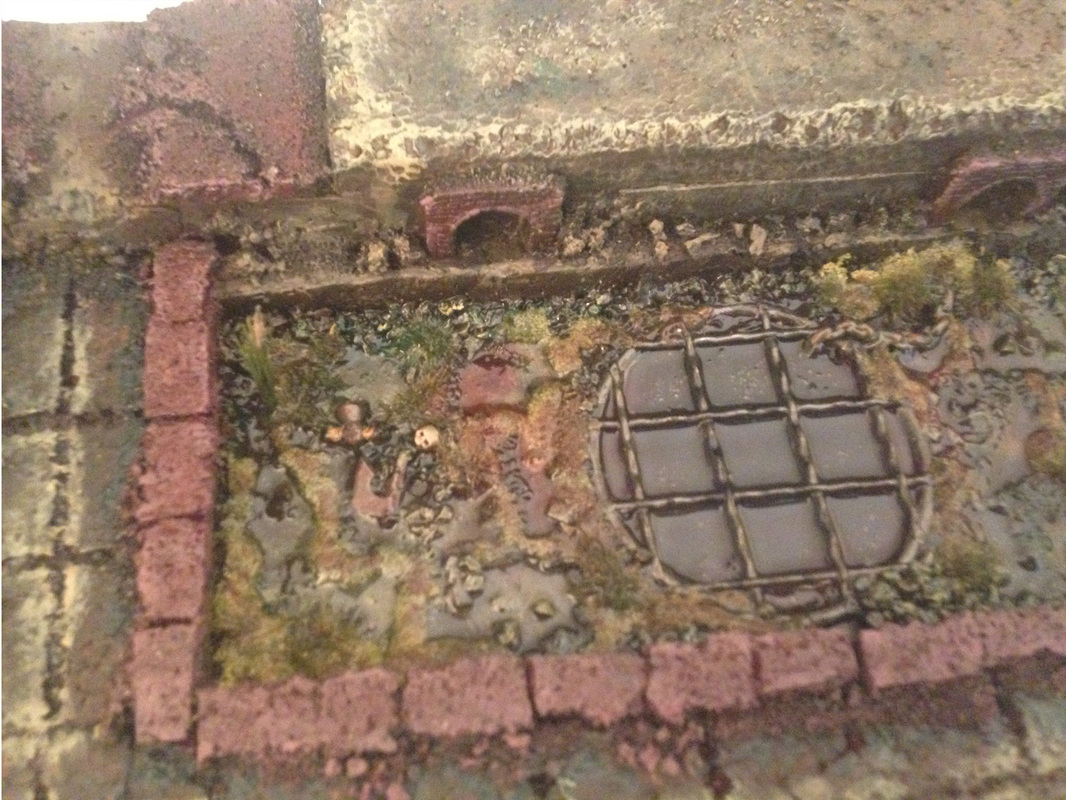
Once I was happy with the look and feel of the pool, I went ahead and did my first layer of water. I first bought the Woodland Scenics water starter kit, I did a test pour on another piece of terrain and used about half the bottle by the time the two layers cured. I knew I was going to need to get more on a larger scale, but since it takes days to dry this stuff I used the remaining pour for my first layer of water. 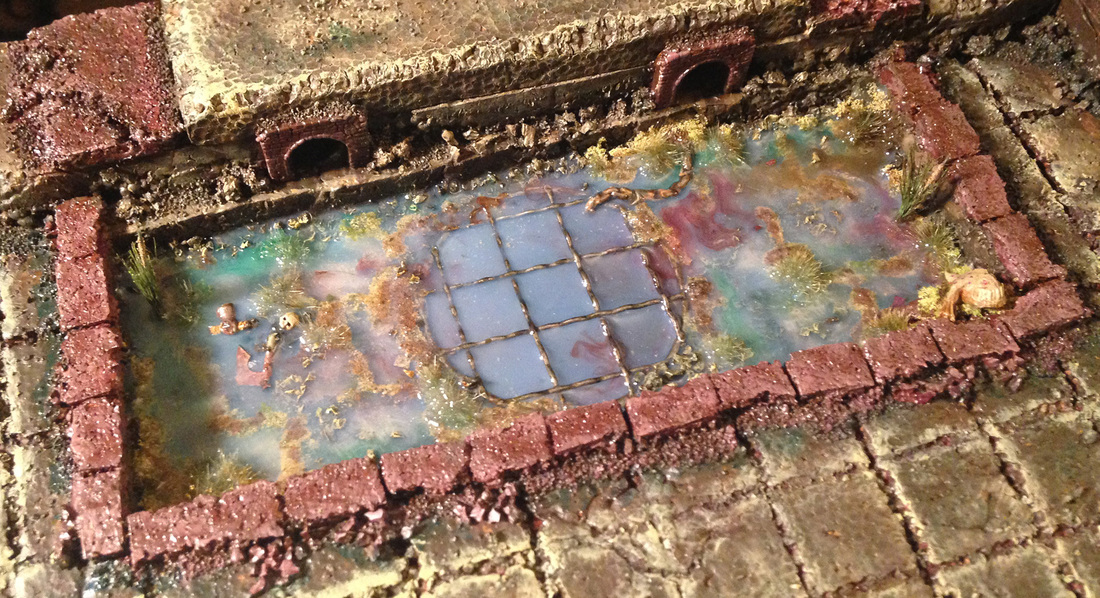 The Woodland Scenic water pours milky blue, but will dry clear. I added drops of reddish-brown ink near the drainpipes and around the middle of the pool. I added drops of dark green ink to the edges of areas. I used a wood skewer to stir around the ink. The dark green worked well as floating mildew and the red worked well as sewage leftover when it all dried.
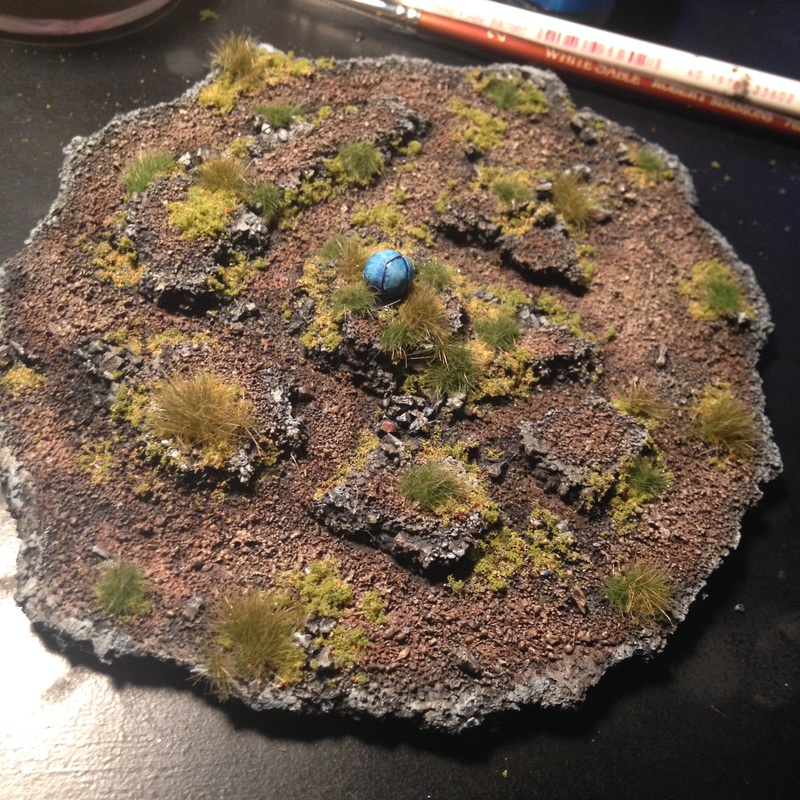
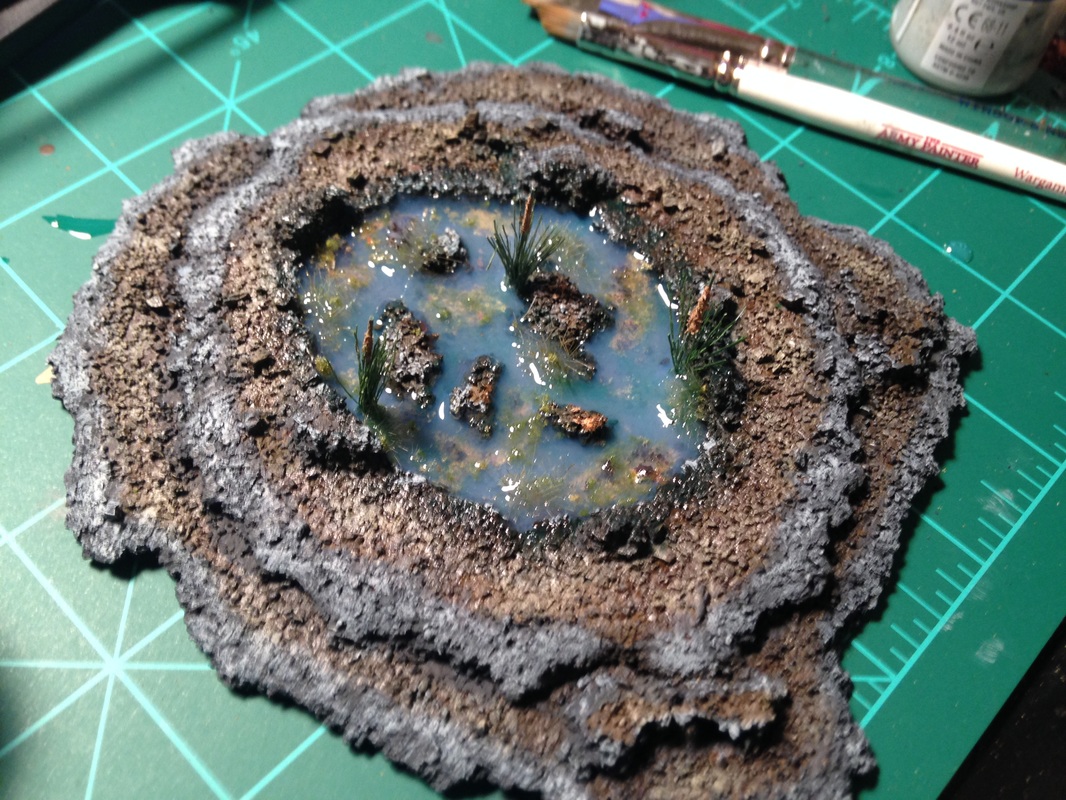
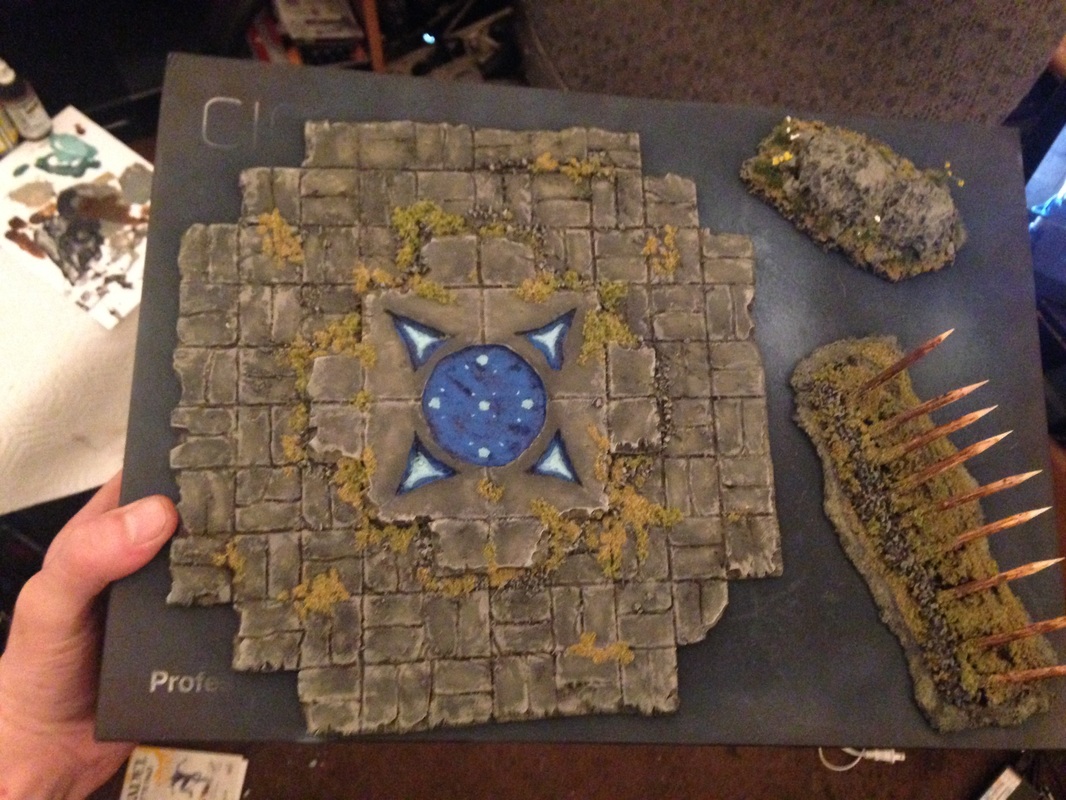
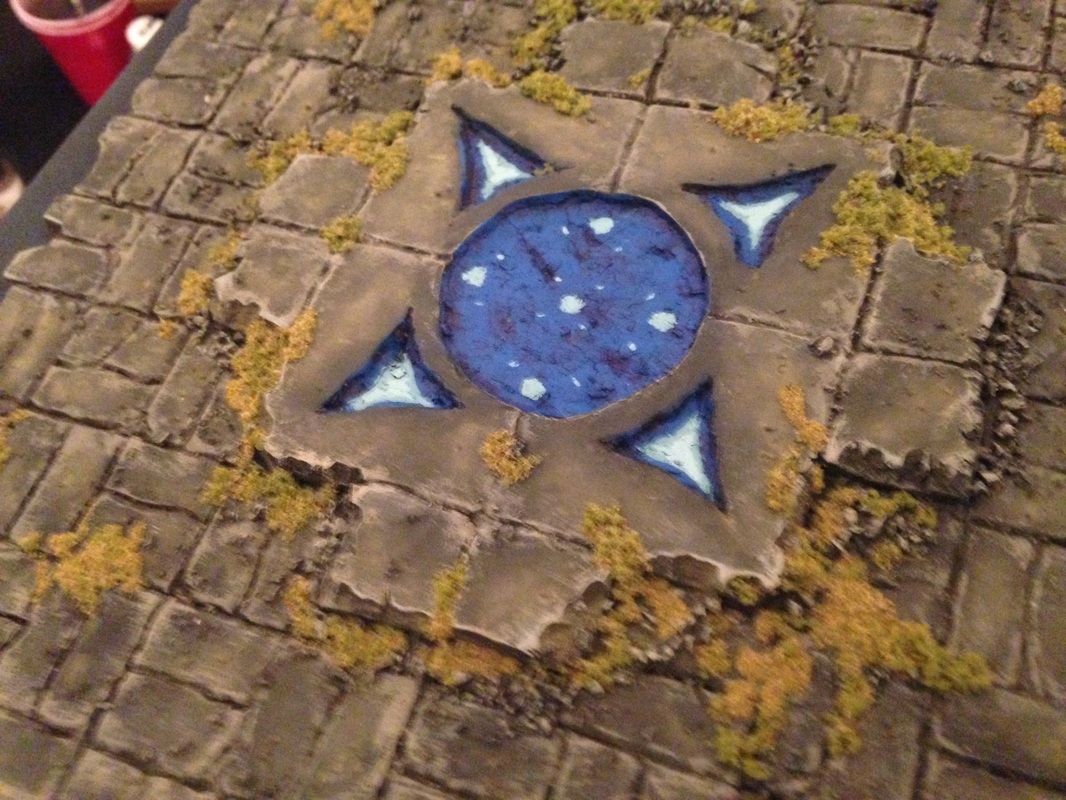
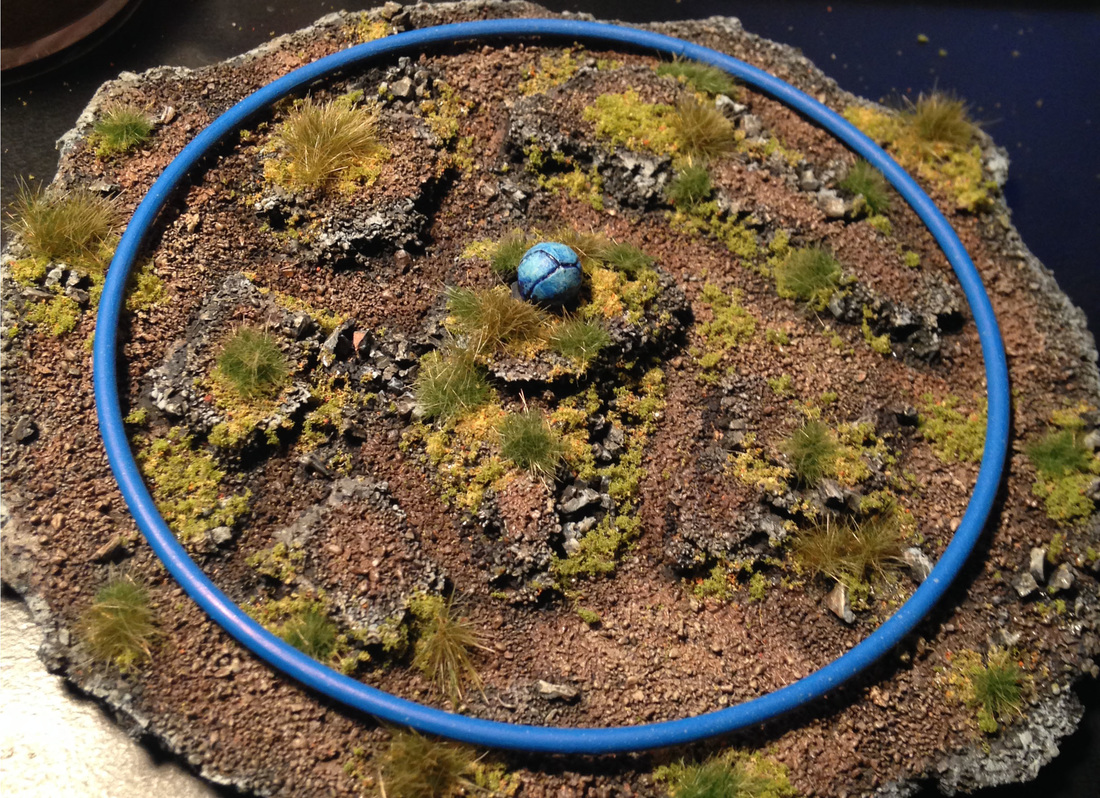
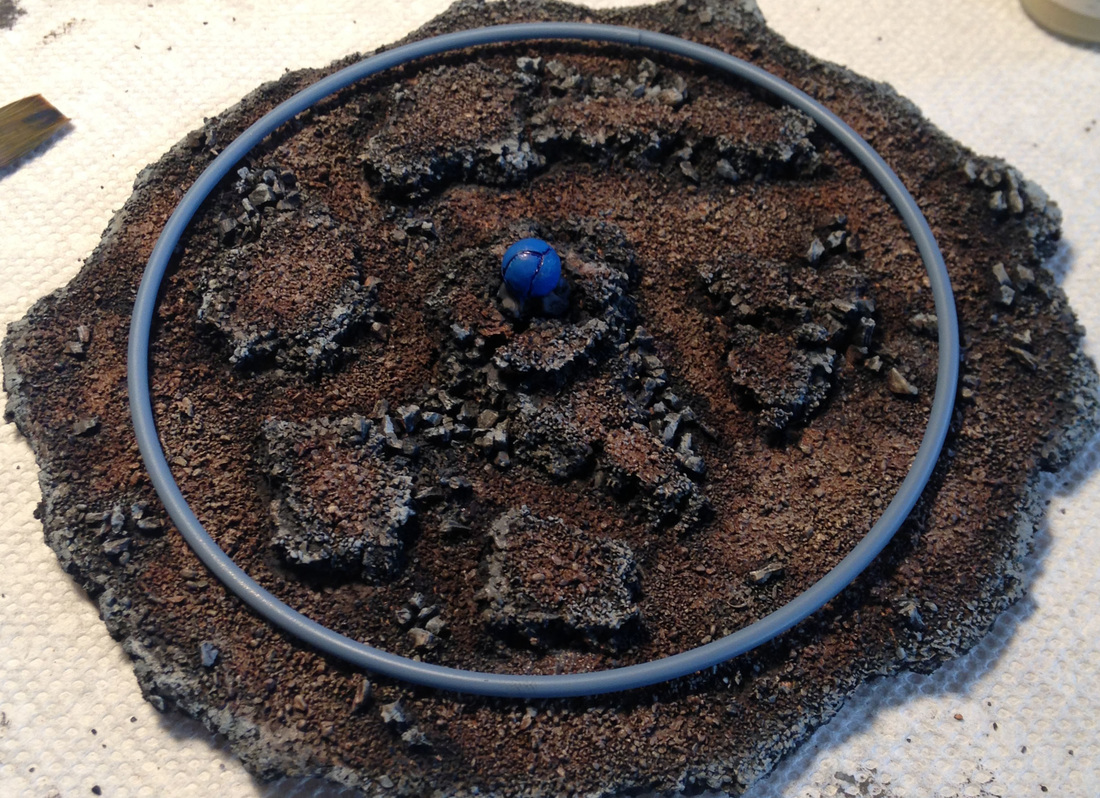
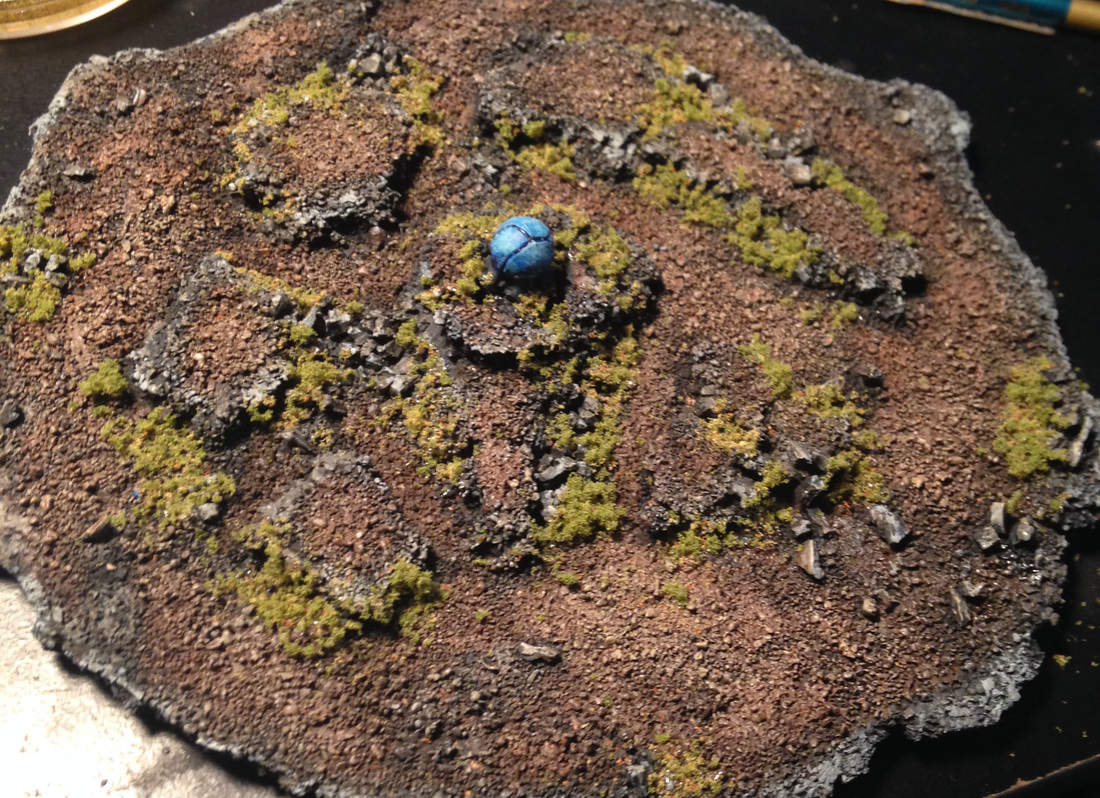
After getting some experience with pouring water, I realized I am going to need quite a bit more to fill the pool. I've been having a lot of fun with the water effects, so I went and invested in a larger volume. I bought Magic Water which comes in a two part solution. After using Magic Water, I am definitely a convert to this water pour. There seemed to be no evaporation at all and it pours clear so you see pretty much what it will look like right away. The mixing of the two parts does create a lot of bubbles, so if you can find a way to minimize them, you'll be happier over all. I mixed up enough to pour a 1/2" deep pool. I used the same technique with the brown and green inks and got similar results. 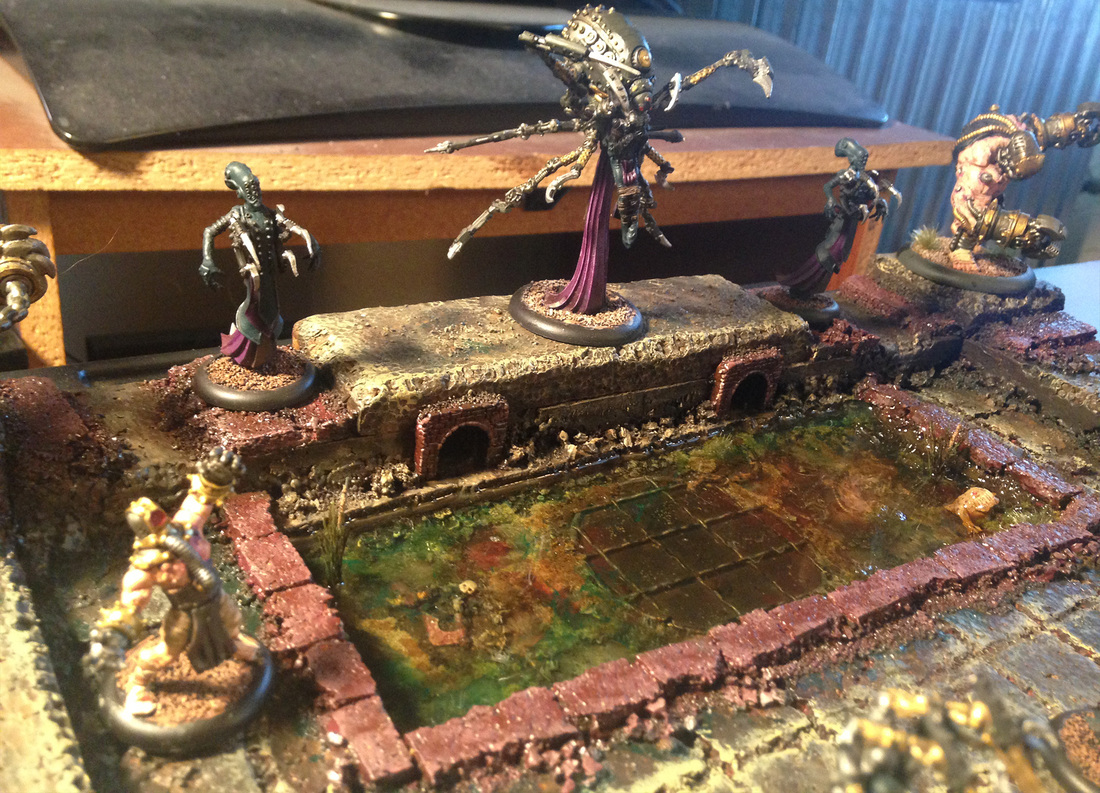 So two of my friends and I really like playing Warmachine and Hordes. Problem with that is that both game's core design really centers around 2 player games. We have found that objective based scenarios have been out best bet with other games, so when we play, we typically attempt to modify the objective type scenarios. Our variation involves the same rules as typical control zone scenarios but with smaller control zones and some modified rules for how long the zone has to be held. It works well and is quite fun. We get some funny looks for our three player WM and Hordes games though. So I had some fun making a custom control zone for us to play with. I got the idea for a colored ring on the terrain from someone. I can't remember when or where or who to give credit, but it isn't my idea. I really liked it though. So here's my attempt.
I made it so the ring just sits on the base. I am making another where the ring is embedded in the ground.
Finally, highlight to pick out some details and glue some standing grass to clumps of moss. For this, I add one clump at a time and move around the whole piece to make it appear natural. Don't put too many in one area, it tends to take over if you clump it too tightly. 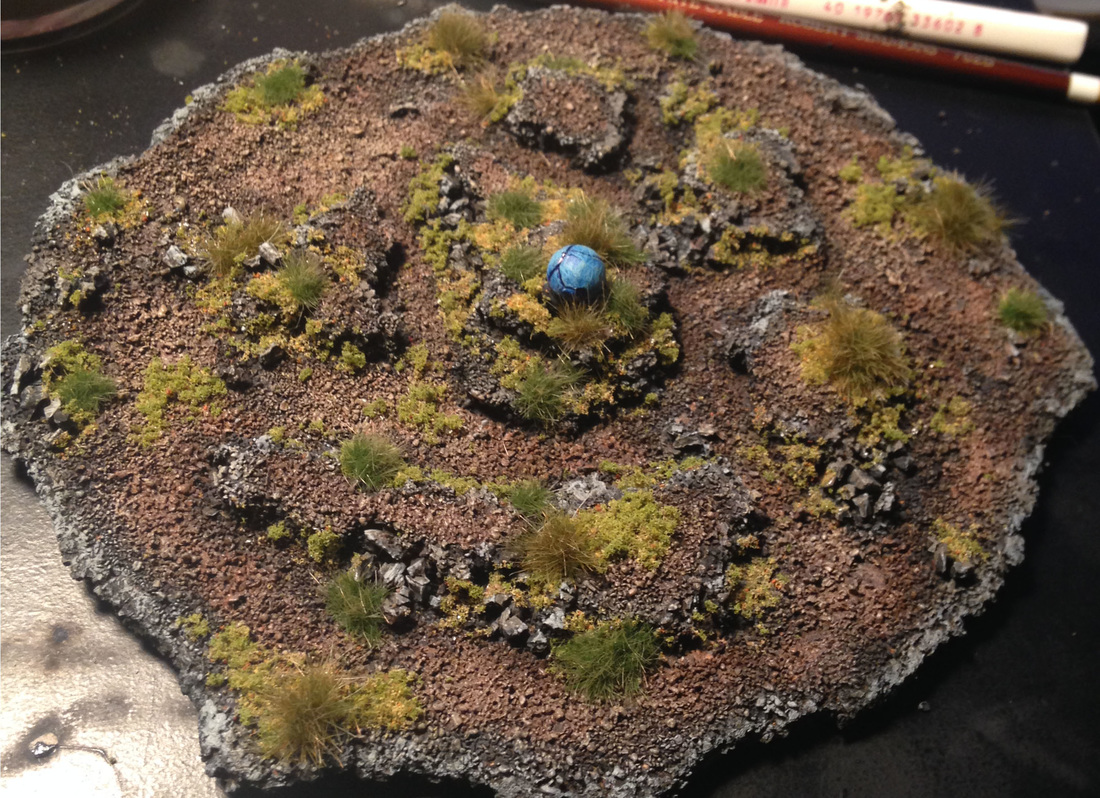 Adding Water So I recently tried my first water pour. i'm pretty happy with it. Here's where I'm at and a breakdown of process. 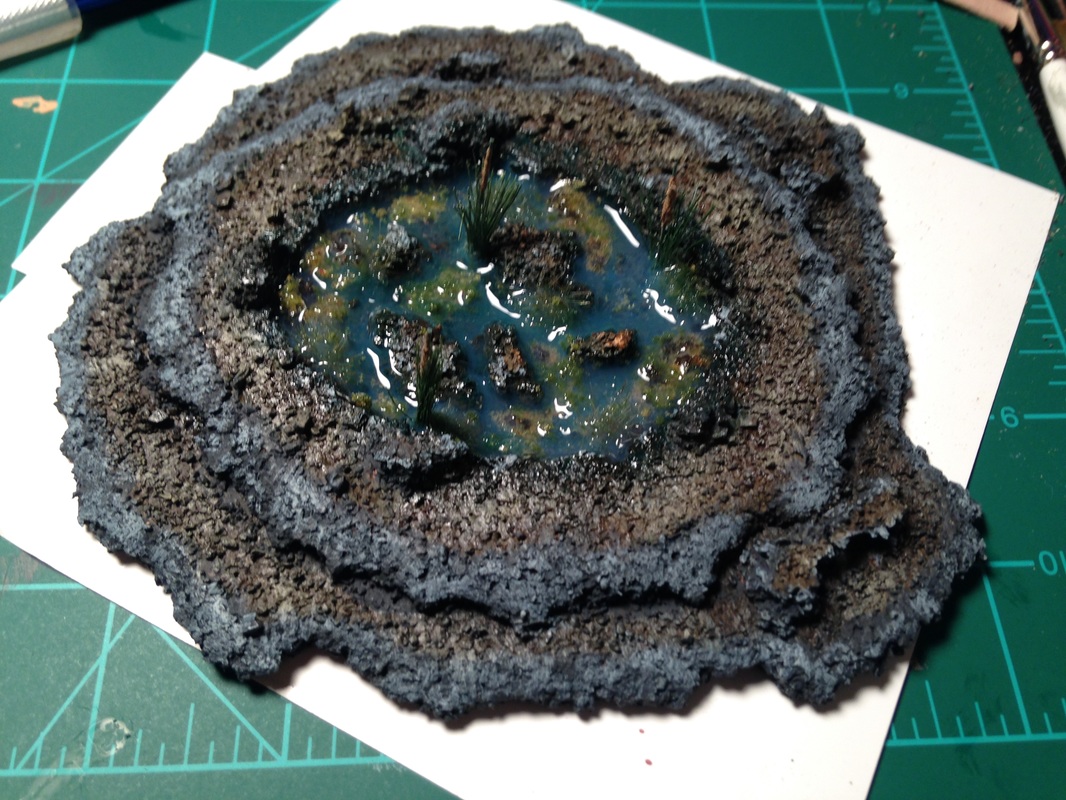 |
AuthorI am a 3d Lighting artist for games, commercials and film. I paint miniatures and build scenery as a hobby. CategoriesArchives |


 RSS Feed
